If you aren’t building, you probably don’t care about this article regarding how and why I laid out my instrument panel the way I did. For those of you that are building, be my guest and read on.
I have spent many Air Ventures looking and playing with avionics and decided some time ago that AFS was my favorite. I don’t have anything against others, but the layout, functionality, and features of the AFS just fit perfectly for me and my flying mission. I’m going to fly a lot of IFR with my airplane, as I already do with the Diamond so want a very capable suite of avionics up front. I also don’t want to upgrade or add on for a very long time so I budgeted to do everything I wanted upfront.
A quick run down of the panel includes:
Two 10″ PFD touch screens
One 12″ MFD touch screen
Dual ADAHRS
IFD 540
Garmin G5 as backup instrument
XM radio and WX
ADSB in and out
Oxygen control head for MH 4iP
A/C control head
Space for SDS control head
Toggle switches and rheostats all matching
All controls that I need located to the left of the center console – no reaching over my pax! Now, my wife is not a pilot and doesn’t really need the PFD in front of her, but we both like her to be situationally aware and I fly with other buddies that will appreciate a PFD on their side. It also allows me to one day teach someone else to fly easier. Again, I don’t want to have to put the airplane down for an upgrade later. Do it right the first time.
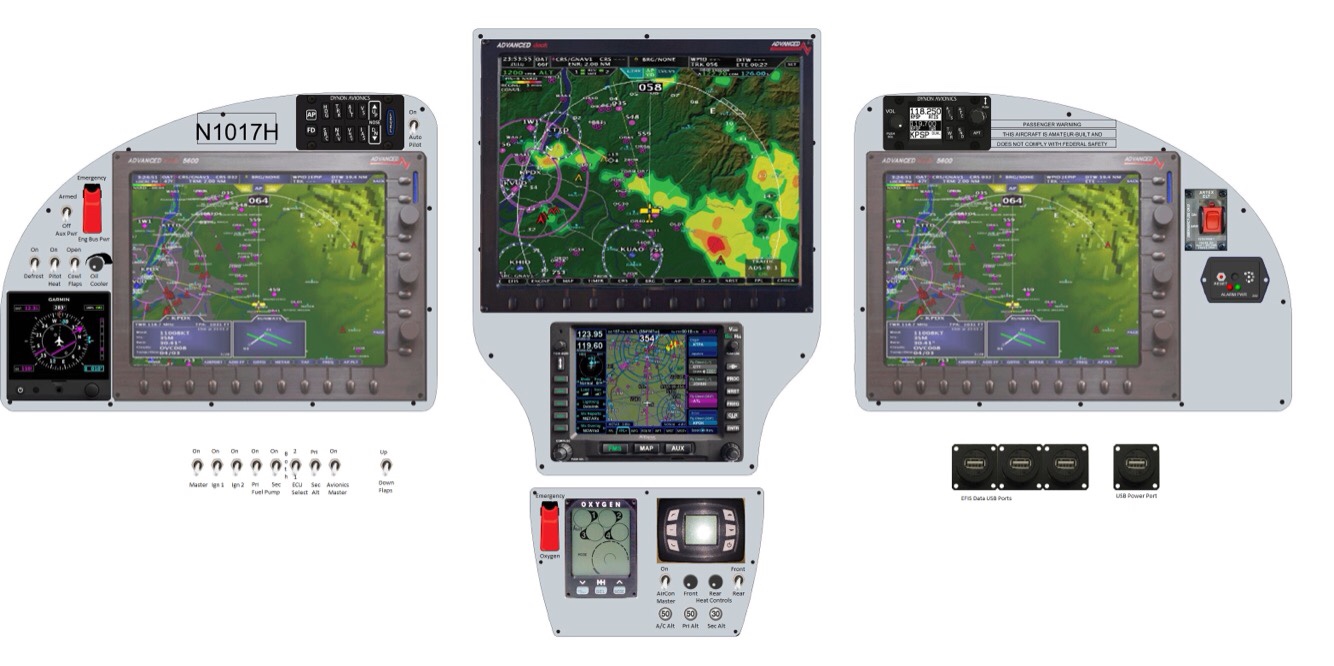
The big pieces go in rather quickly as there aren’t many options of where to put them. My main concerns were what switches go where and how to get a good flow on the order of switch groupings. I also was determined to create a back light setup for the switches much like Ed Krantz did on his plane. More on this later.
With the main components located, I decided on all lighting switches and dimmers to be located on the overhead console. The upper left has the “misfit” switches like defrost, pitot heat, oil cooler, etc. The main switch panel in front of me will have master switches and all engine controls in order of startup procedures. Finally, the lower console will have the O2 and cabin climate controls where either left or right seat occupant can easily control them.
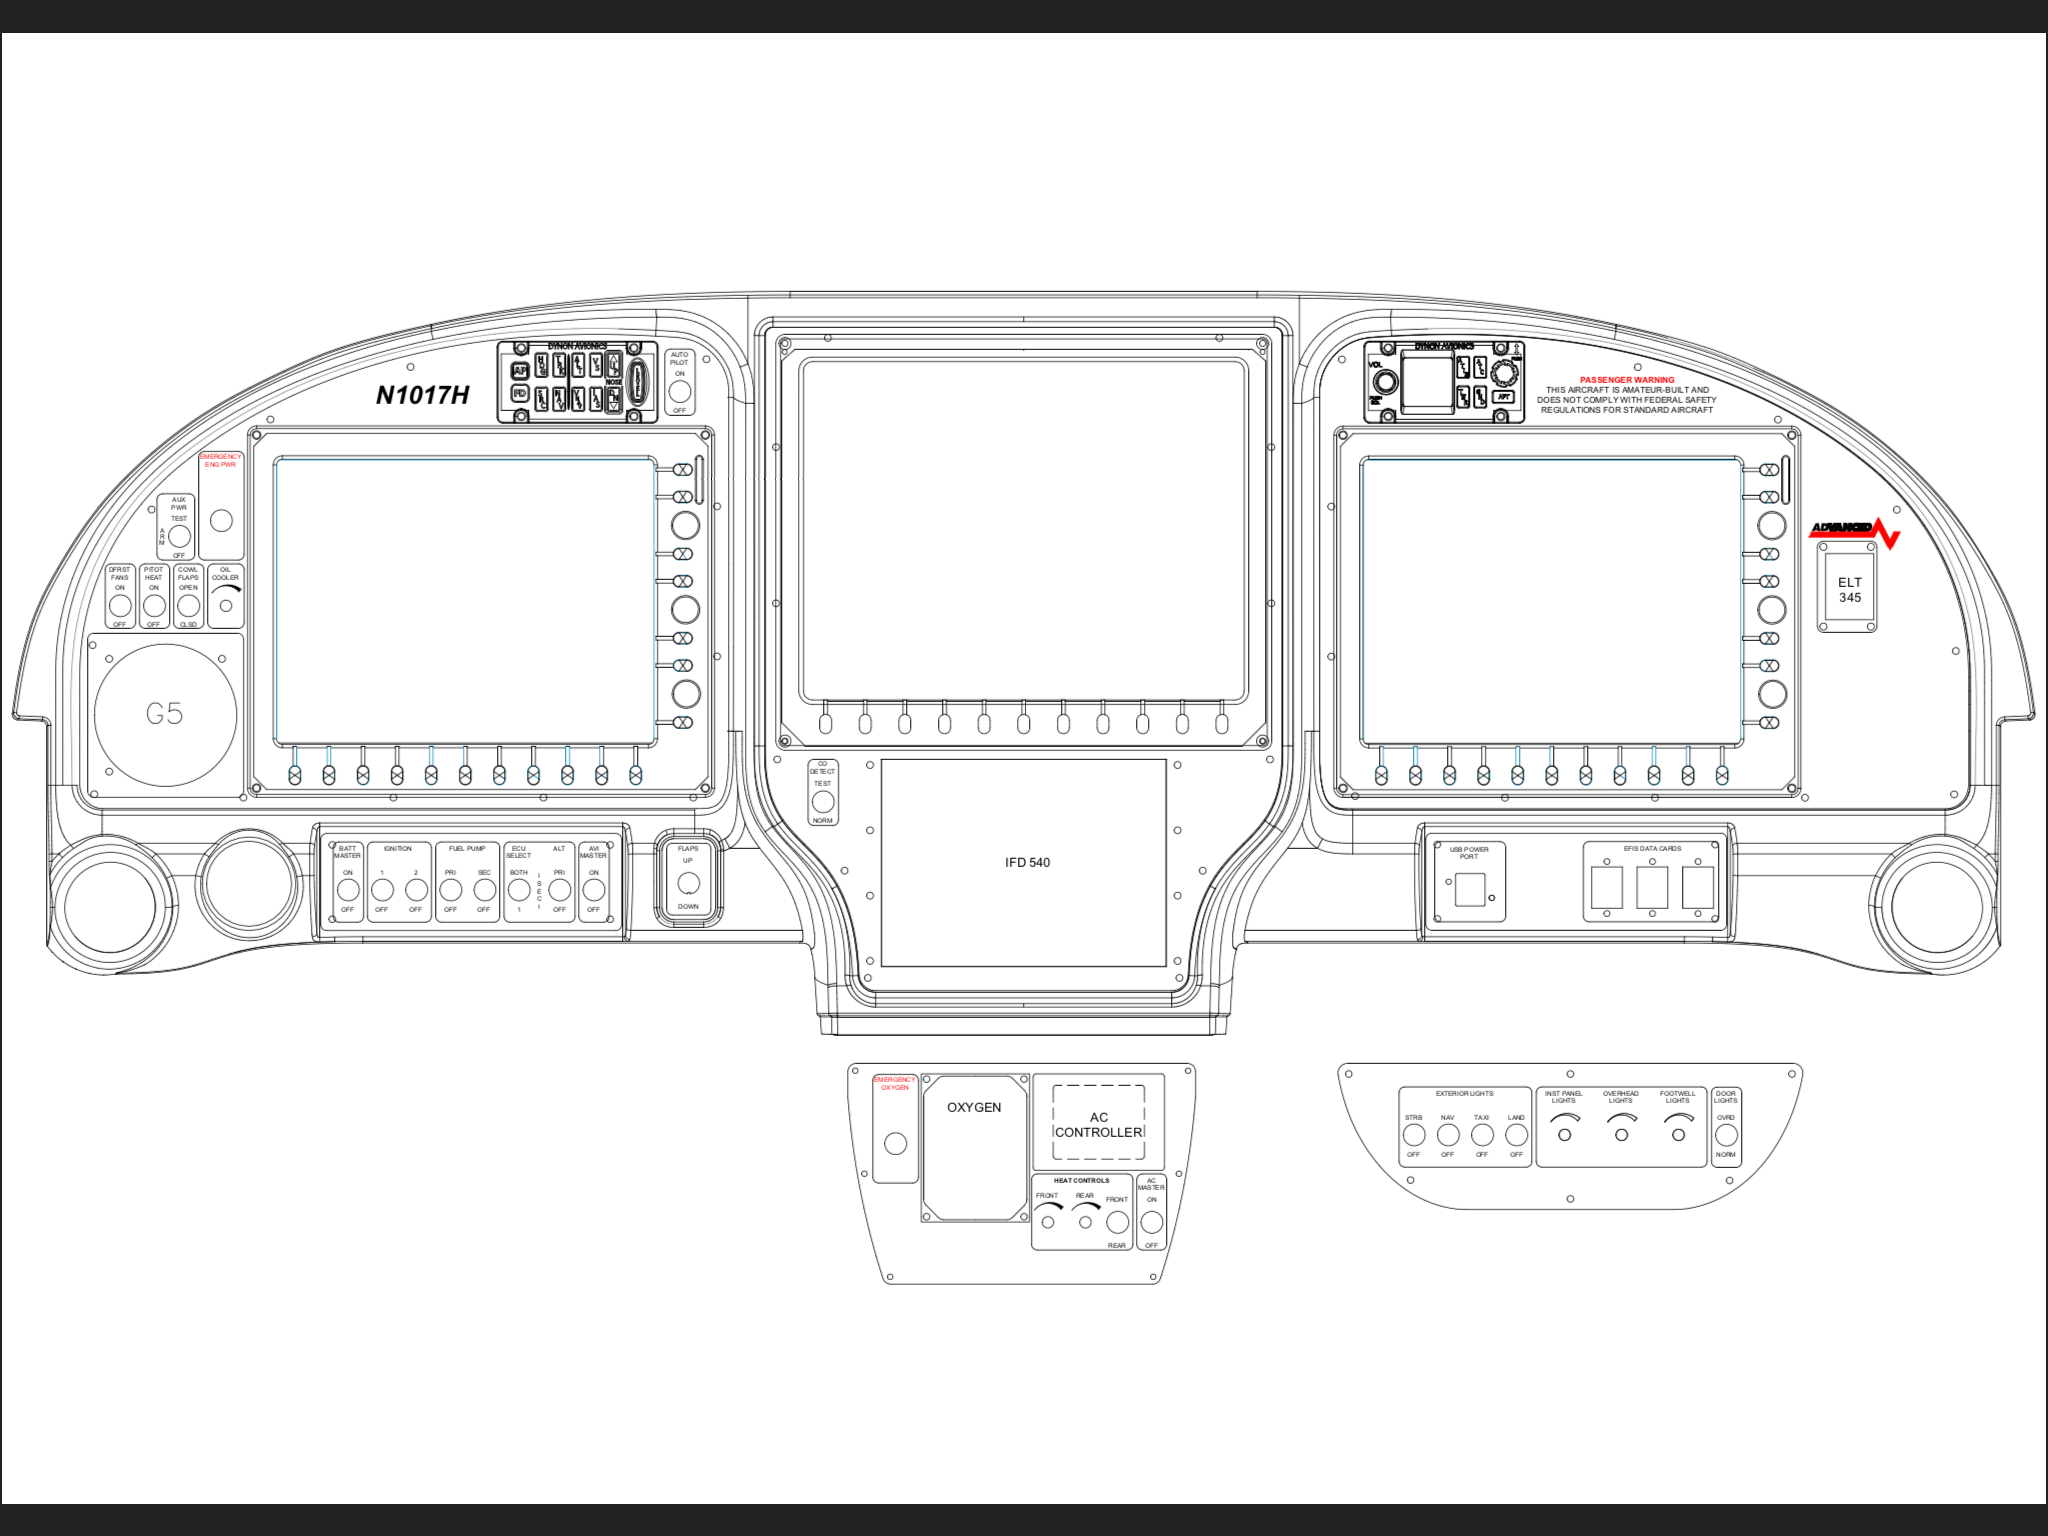
The space for the SDS control head is not ideal, but that instrument, should I go with SDS, is really only used during testing and tuning. The EFIS will display all engine parameters for normal operations and I haven’t even decided if I’ll mount the display on the panel or remote mount it for use only when I need it.
I do a lot of night flying and despise red dome lights or using a flashlight. While all three screens and the GPS will put out a good amount of ambient glow, I wanted the switches to be properly backlit to add that extra pop to the panel. While playing around on the internet looking for lighting solutions, I came across electroluminecsent or EL panels. They are a really neat product, only about 1/32″ thick and available in many different sizes which are then trimmable with a few restrictions. All run off of a 12V transformer and provide equal, dimmable, light across the entire surface. Perfect for what I was wanting!
I ordered a test piece to experiment with in the shop and requested a sample of engraved acrylic from Aircraft Engravers. Match made in heaven. The EL panel glows nicely through the laser engraved markings and can be cut, trimmed, and hole punched for all of the switches and dimmers that need to go into the panels. The transformer makes a bit of high pitch whine, but it will be drowned out in the airplane and a few flight tests in the Diamond confirmed that the transformer was not electronically noisy, only audibly so.
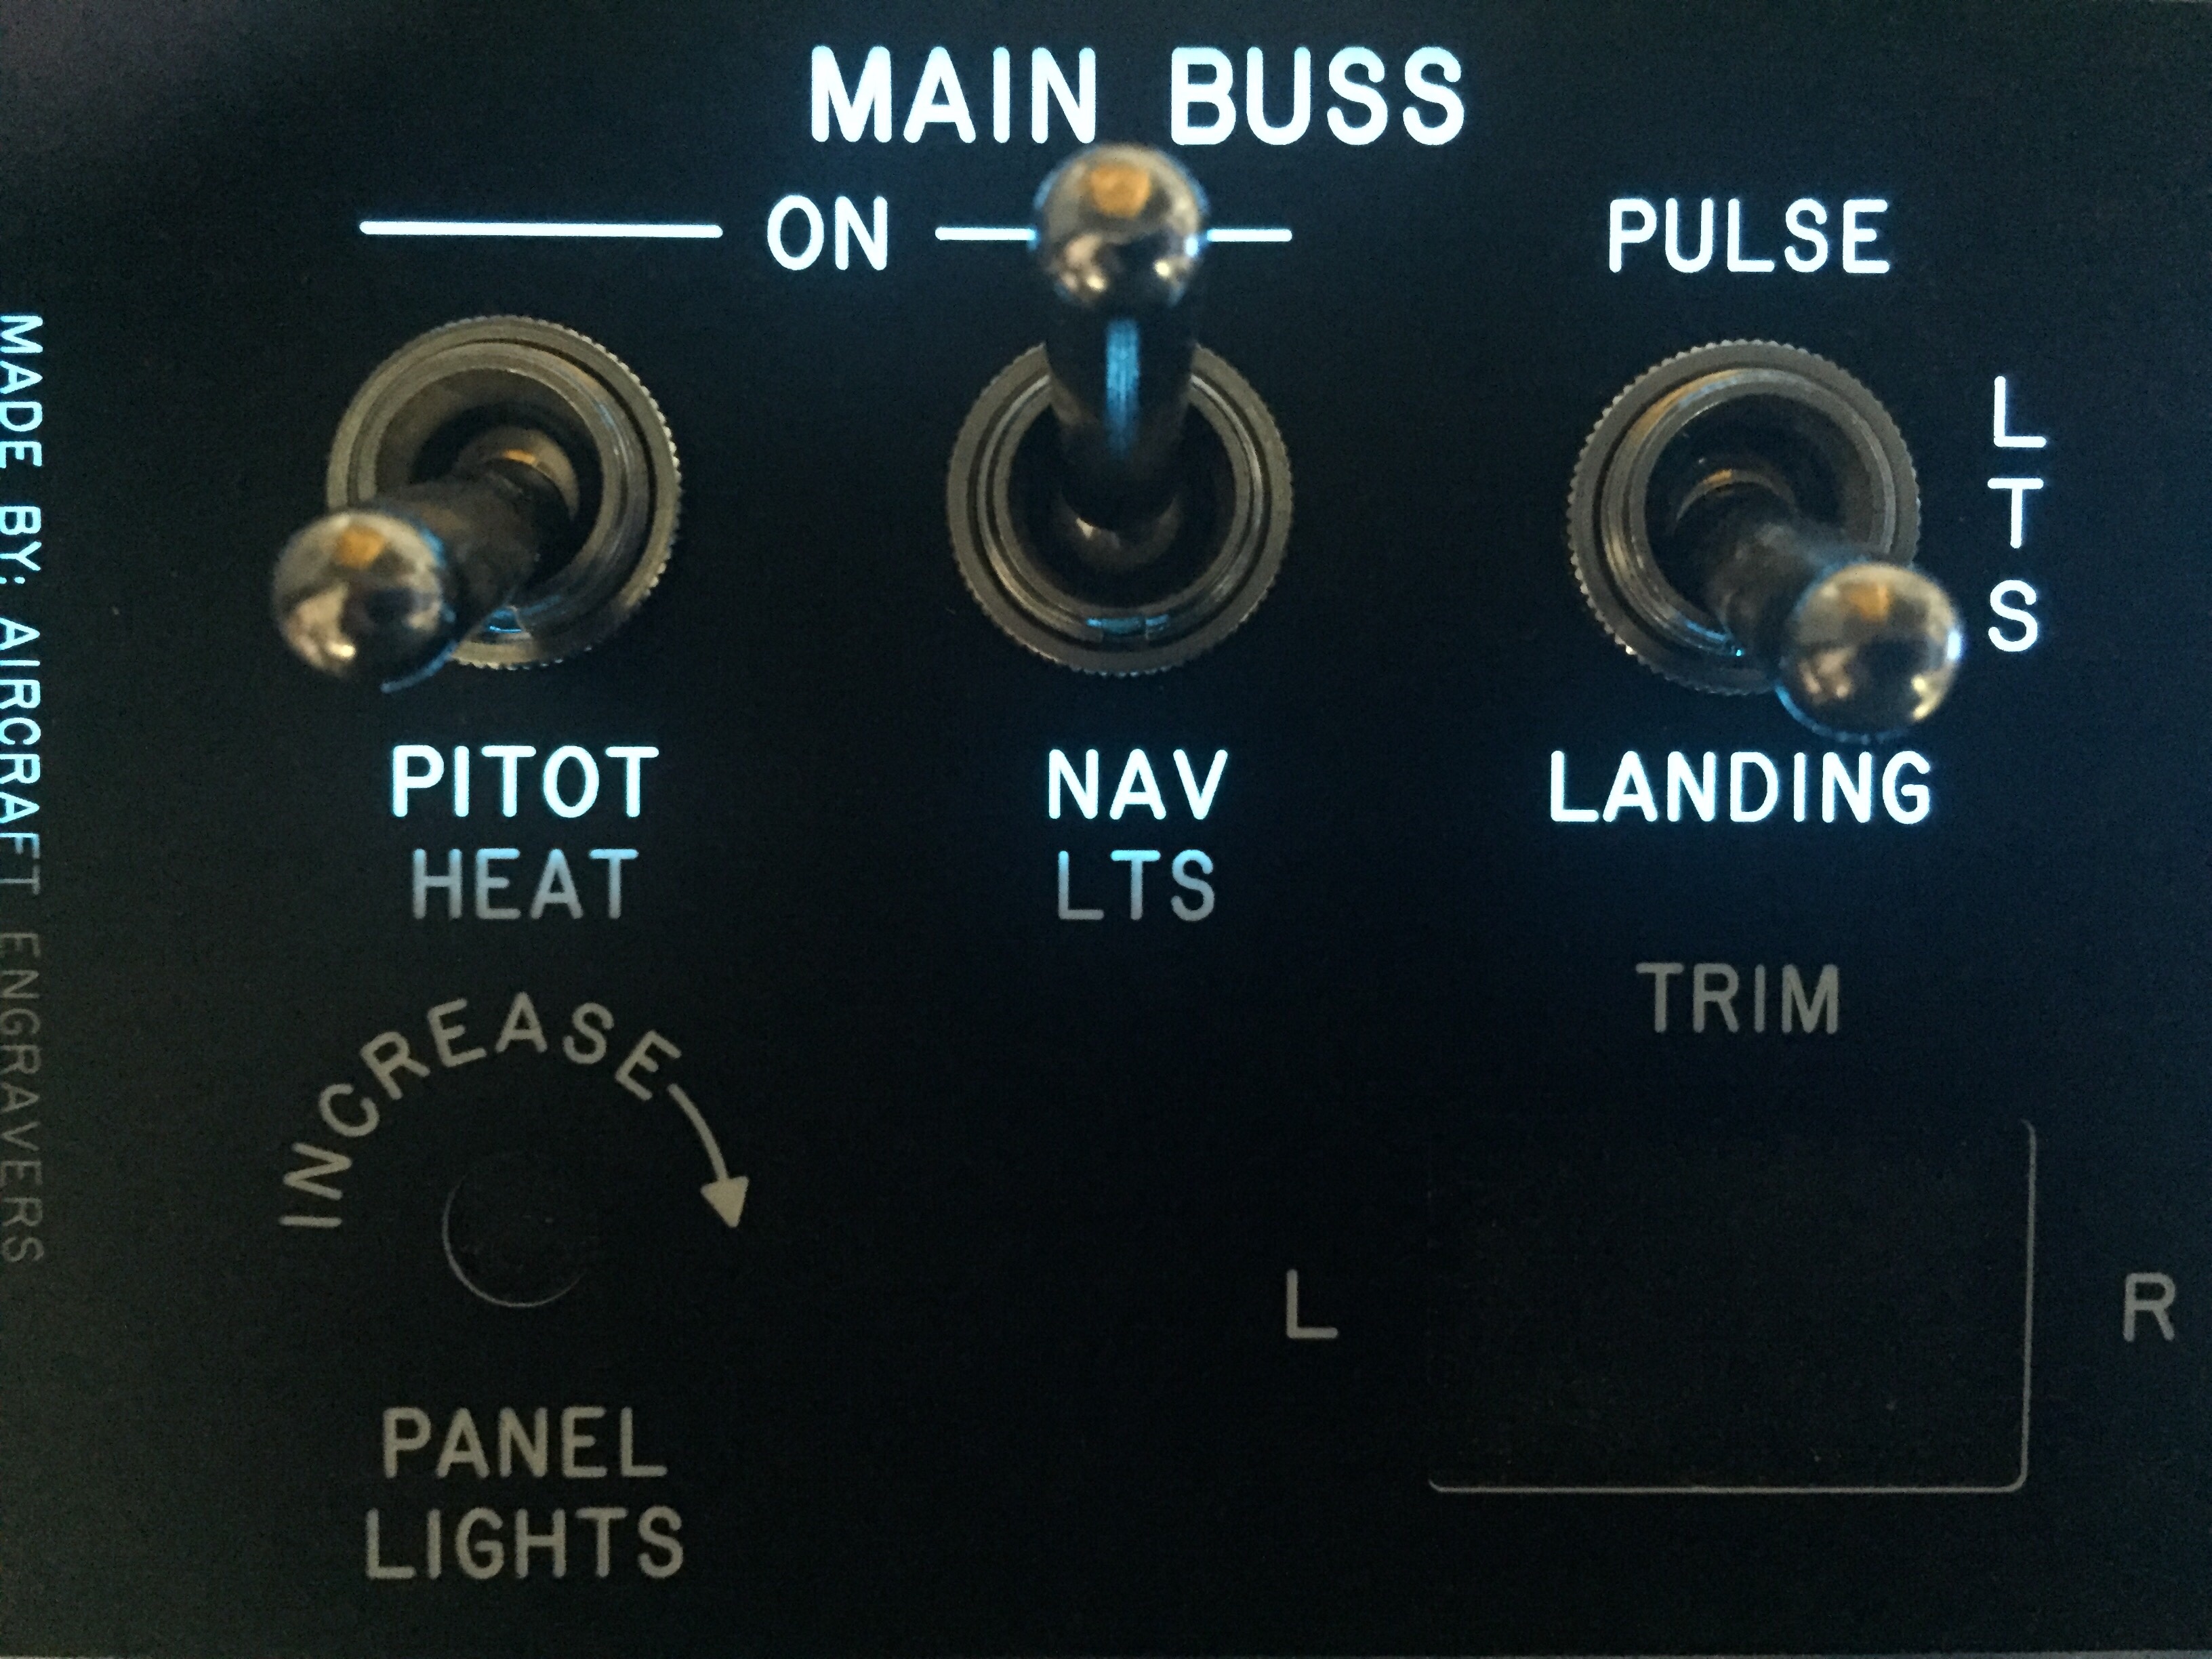
With a successful experiment, I set back to work in Draftsight to come up with templates to be cut and engraved by Aircraft Engravers. AFS, who is building my panel, will still cut, paint, and label the four main panels. This will be a presentable back up in case my EL project doesn’t work out in the long run. I worked with an EL supplier from Etsy who has been awesome to get a proper prototype panel cut for the overhead console. There are some limitations with the EL panels such as the power lead locations and two edges that have the contacts running along them not being able to be cut. It was a bit of puzzle work, but in the end fairly simple to draft up and layout. Aircraft Engravers cut and engraved the acrylic overlay for the overhead console panel and I was able to put it all together with switches to see how it looked.
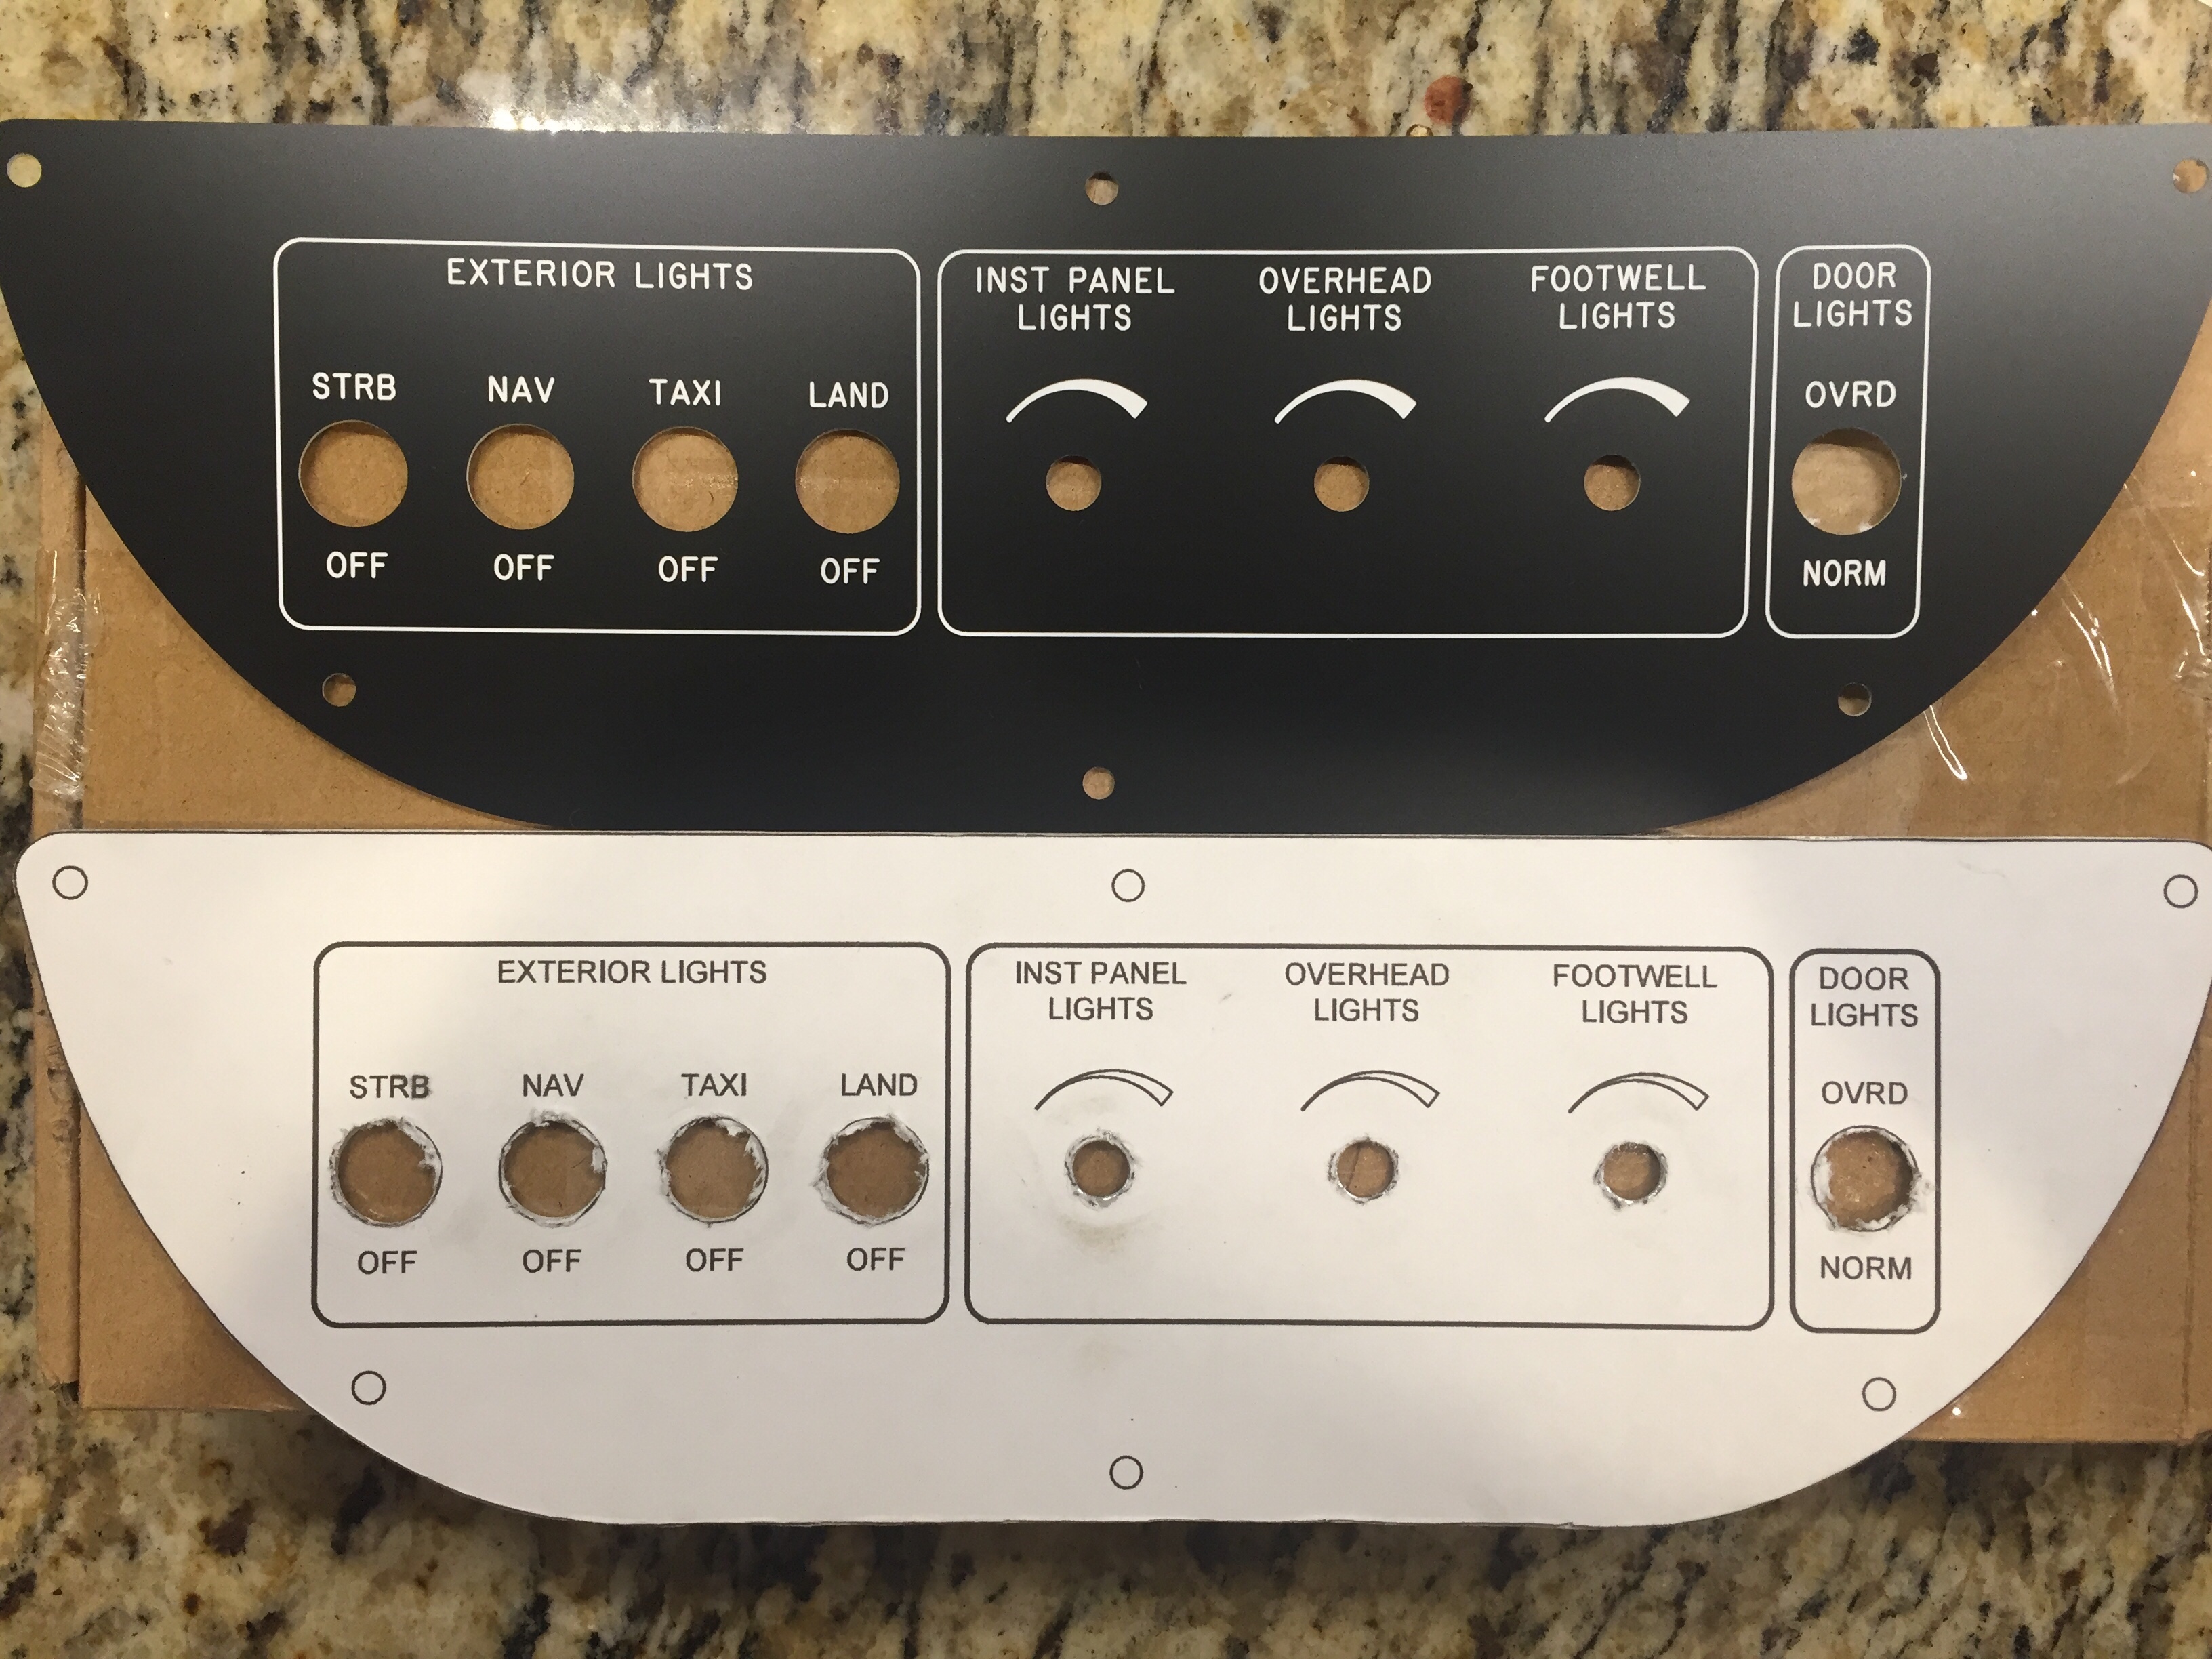
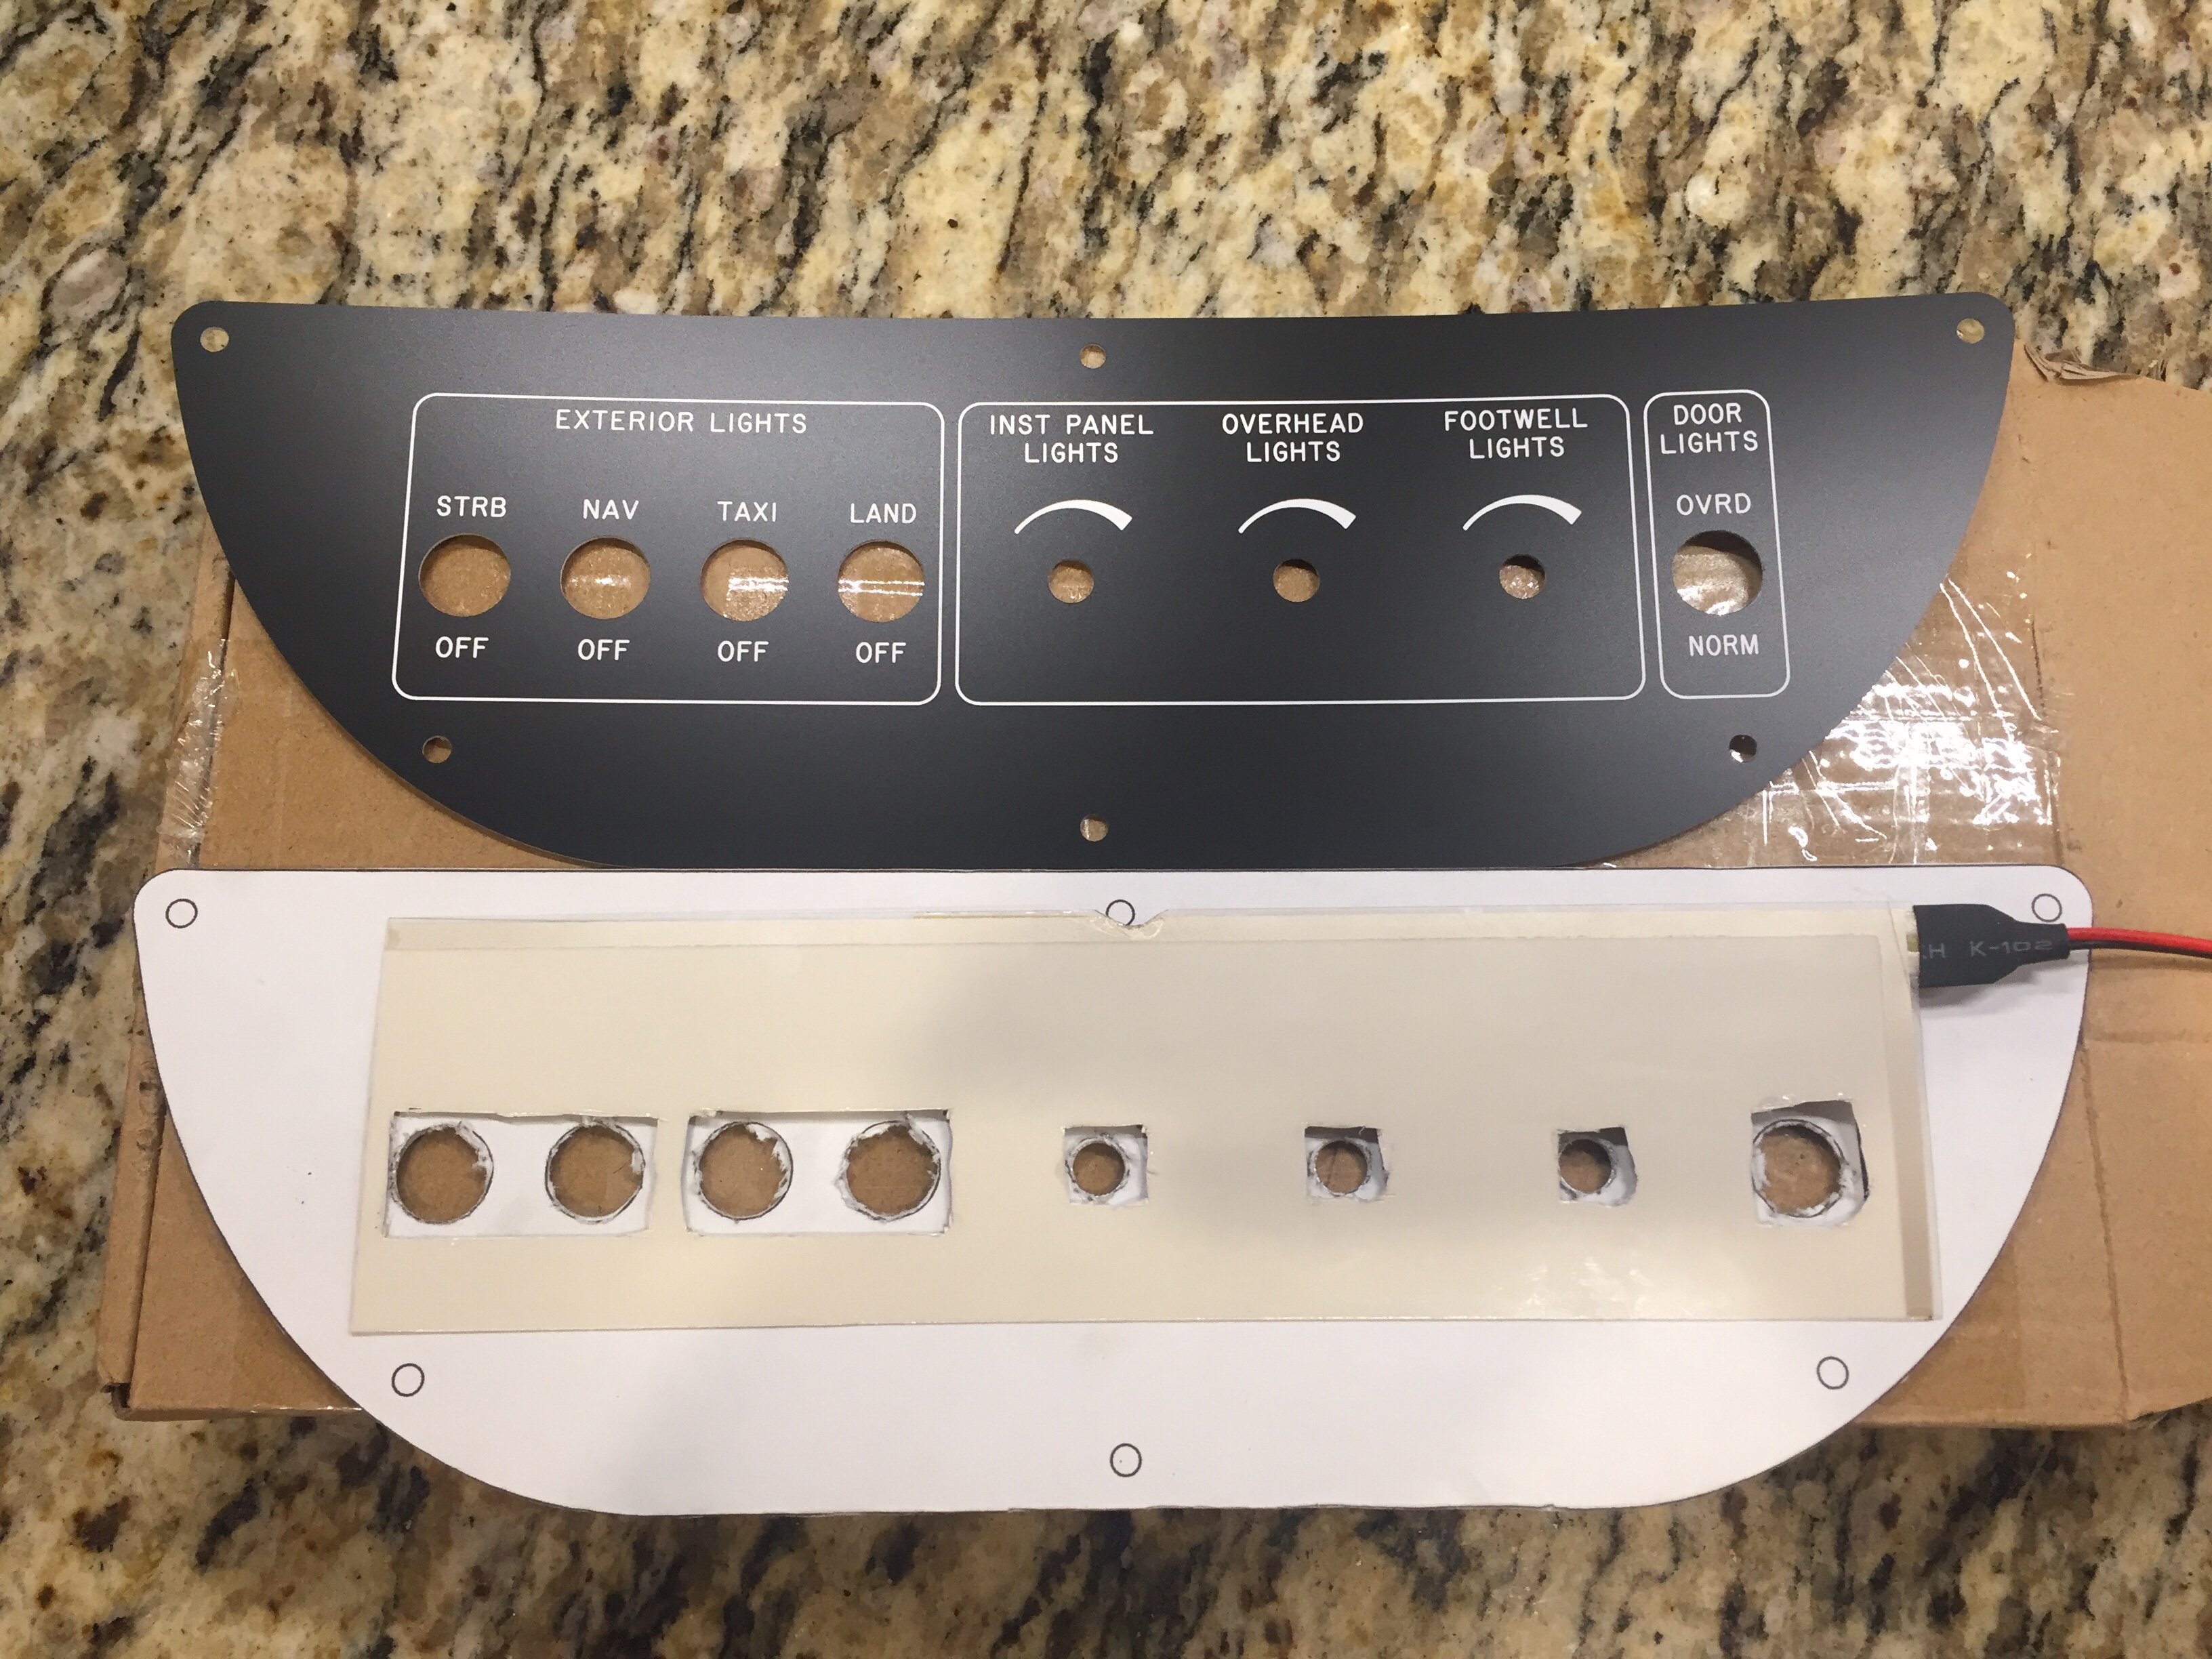
I was so excited that I forget to specify which color, so Marc sent white. No worries, as the production version will be a blue. Needless to say, I spent a lot of time sitting in the dark garage flipping switches that weren’t wired to anything! It’s a very elegant solution and a rather easy one at that. For the whole cockpit, all EL panels will be wired together with one transformer and be dimmable through a rheostat. I wanted all of the instrument panel to match, so I’ll be spending some extra money on acrylic overlays for the entire panel rather than just smaller panels around the switches, but it’s my plane and I’ll do what I want to! Wayne at Aircraft Engravers has been great and is pretty excited at this working so well, as he may be offering more panels like this in the future.

So now, I have finalized the lighting panels and overlay panels for production. I’m hoping the avionics arrive on time at the end of February for me to finish wiring and installing. With my higher level of customization, I’m not using the AFS quick panel switches so I’ll have a bit more work to do than most quick panel customers. I’m very grateful to Rob, Stephan, and all of AFS for hanging in there with me on this over the top instrument panel. In the end, I’m confident I’ll have a real show stopper that I’ll be admiring for decades to come.
