The art of design

If you aren’t building, you probably don’t care about this article regarding how and why I laid out my instrument panel the way I did.  For those of you that are building, be my guest and read on.

I have spent many Air Ventures looking and playing with avionics and decided some time ago that AFS was my favorite.  I don’t have anything against others, but the layout, functionality, and features of the AFS just fit perfectly for me and my flying mission.  I’m going to fly a lot of IFR with my airplane, as I already do with the Diamond so want a very capable suite of avionics up front.  I also don’t want to upgrade or add on for a very long time so I budgeted to do everything I wanted upfront.

A quick run down of the panel includes:

Two 10″ PFD touch screens

One 12″ MFD touch screen

Dual ADAHRS

IFD 540

Garmin G5 as backup instrument

XM radio and WX

ADSB in and out

Oxygen control head for MH 4iP

A/C control head

Space for SDS control head

Toggle switches and rheostats all matching

All controls that I need located to the left of the center console – no reaching over my pax!  Now, my wife is not a pilot and doesn’t really need the PFD in front of her, but we both like her to be situationally aware and I fly with other buddies that will appreciate a PFD on their side.  It also allows me to one day teach someone else to fly easier.  Again, I don’t want to have to put the airplane down for an upgrade later.  Do it right the first time.
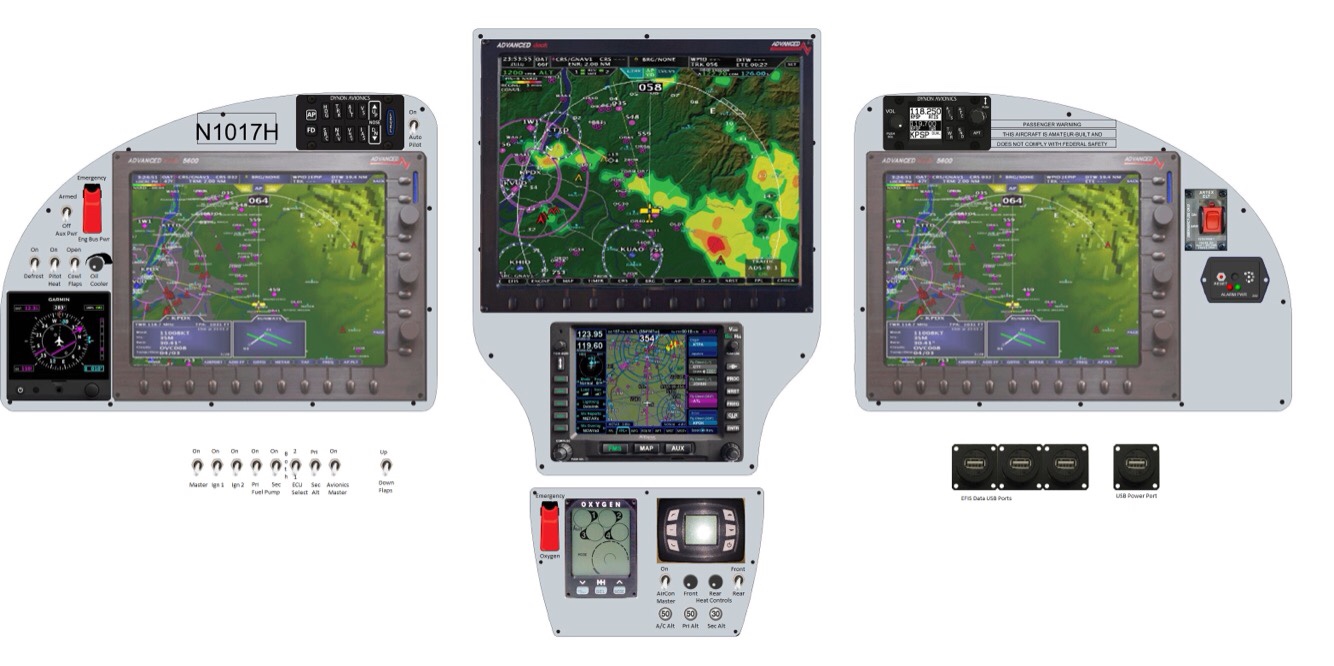
The big pieces go in rather quickly as there aren’t many options of where to put them.  My main concerns were what switches go where and how to get a good flow on the order of switch groupings.  I also was determined to create a back light setup for the switches much like Ed Krantz did on his plane.  More on this later.

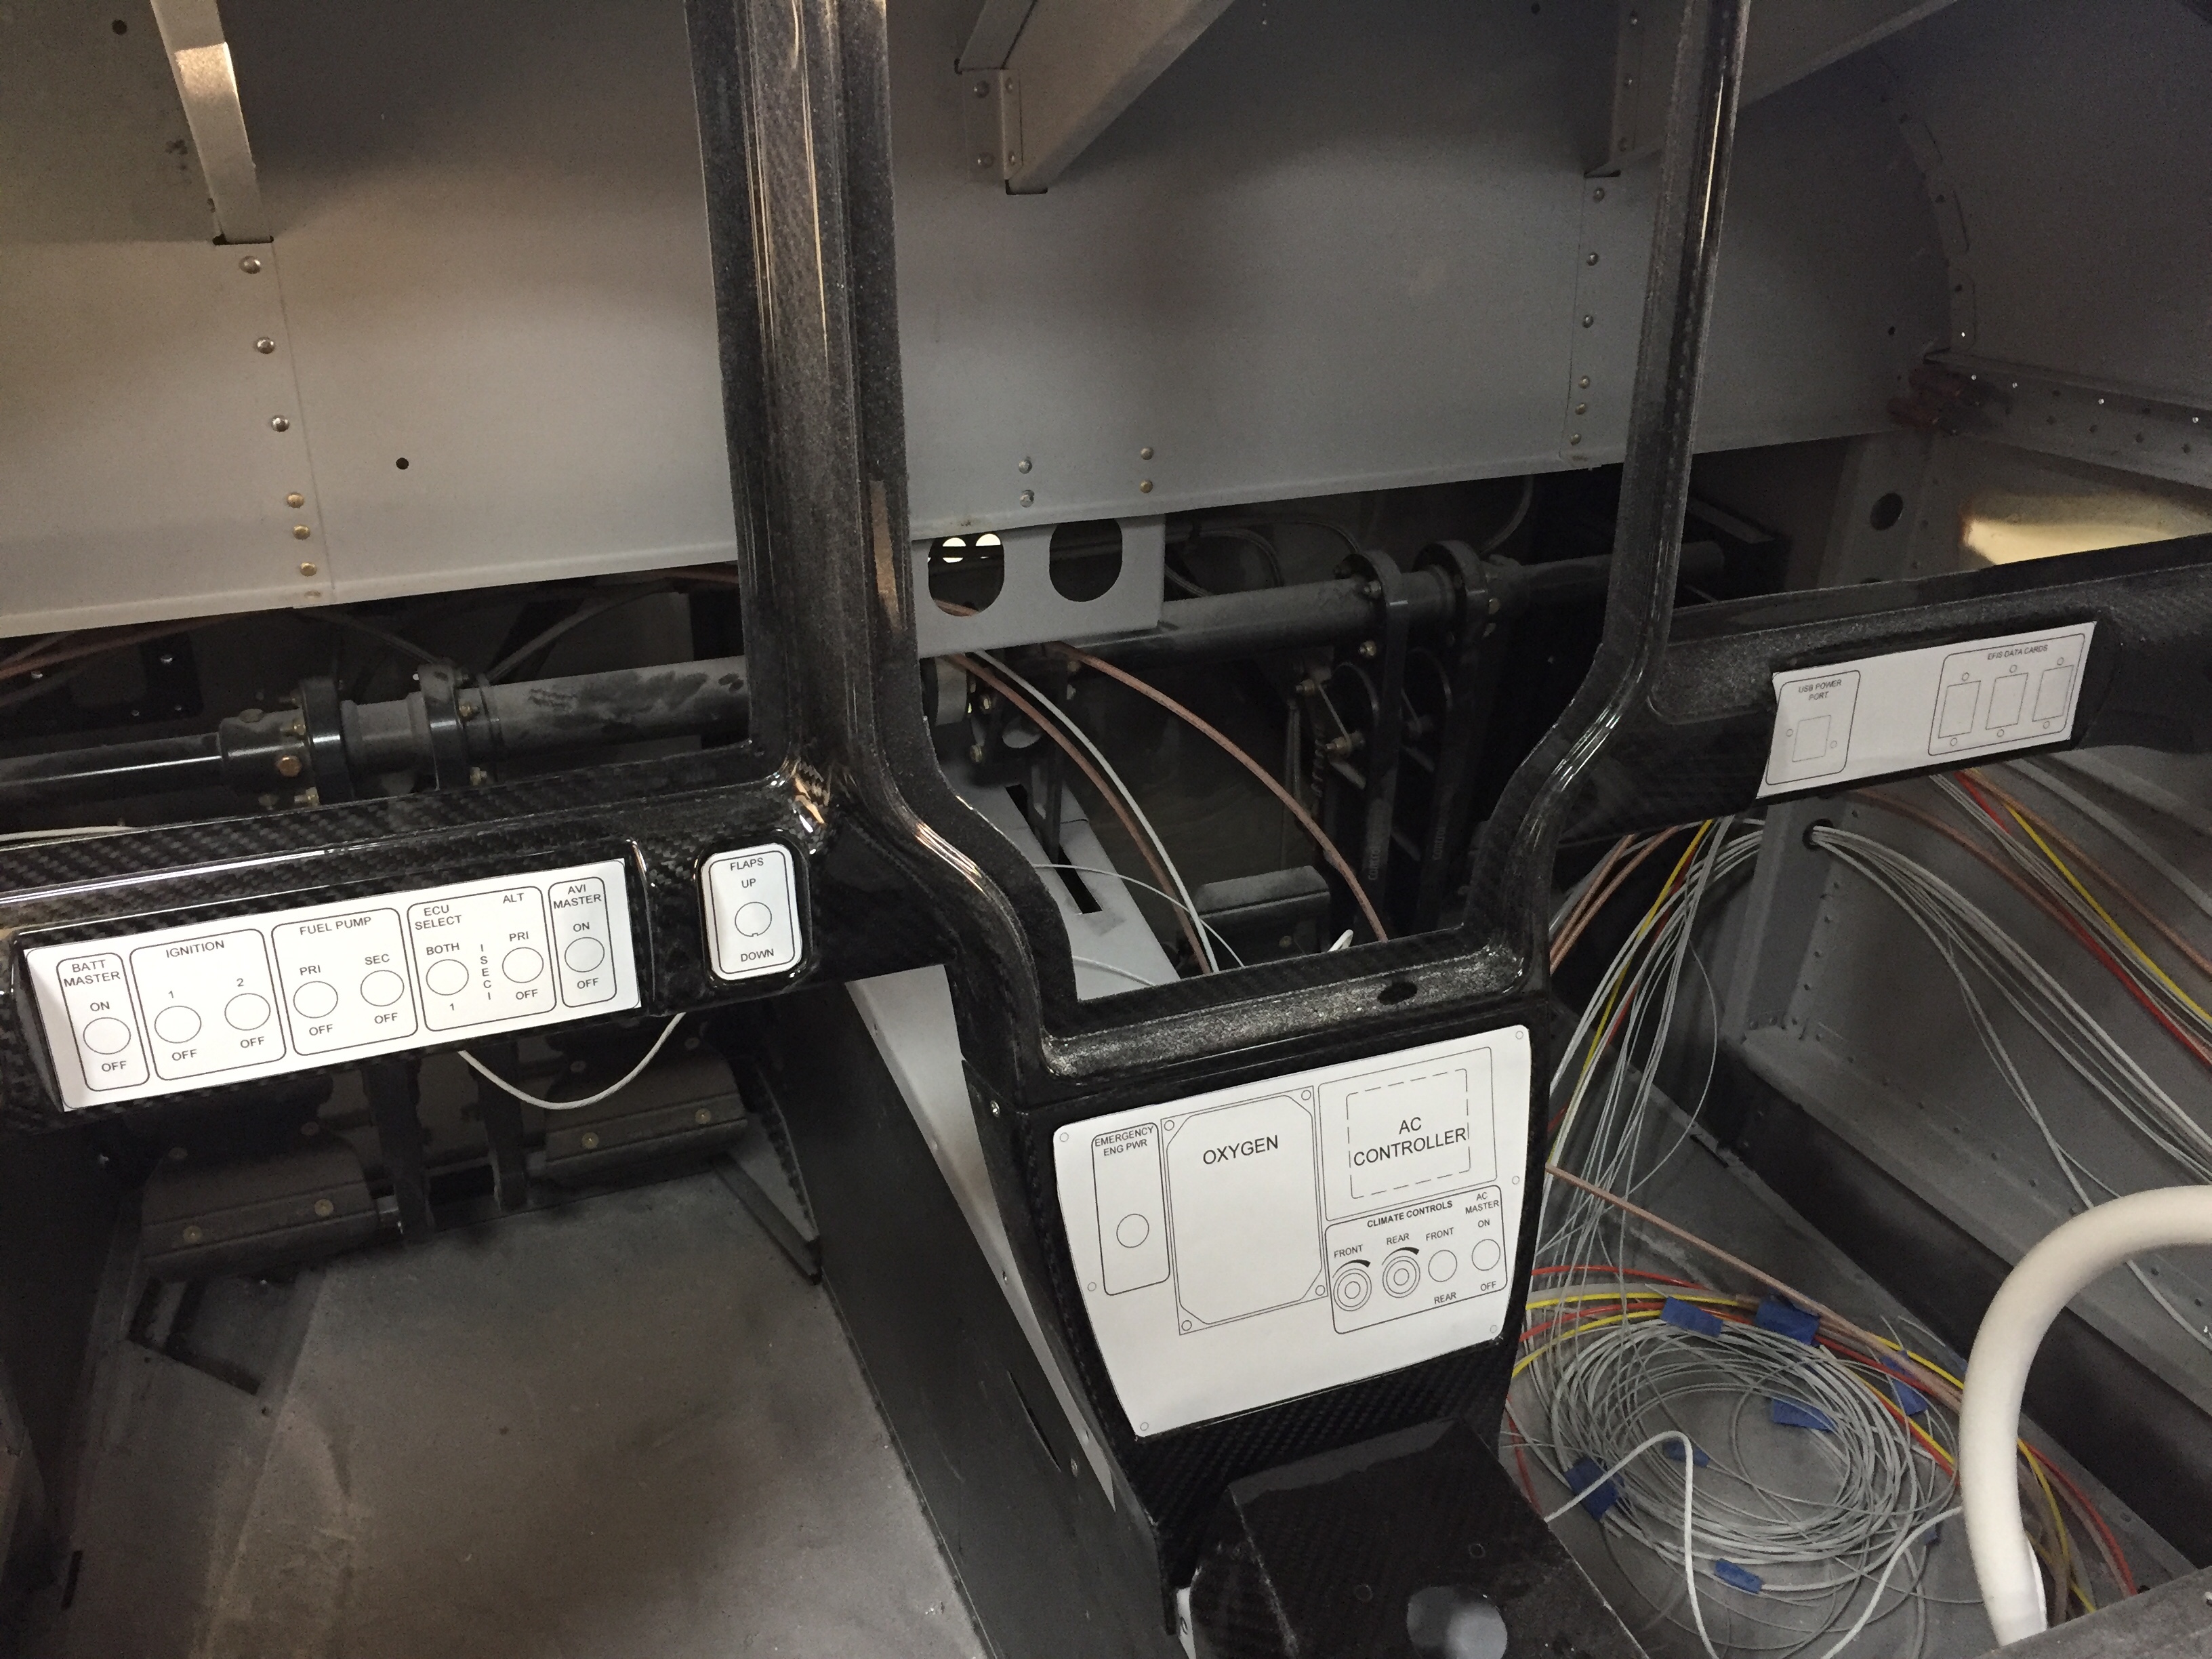
With the main components located, I decided on all lighting switches and dimmers to be located on the overhead console.  The upper left has the “misfit” switches like defrost, pitot heat, oil cooler, etc.  The main switch panel in front of me will have master switches and all engine controls in order of startup procedures.  Finally, the lower console will have the O2 and cabin climate controls where either left or right seat occupant can easily control them.
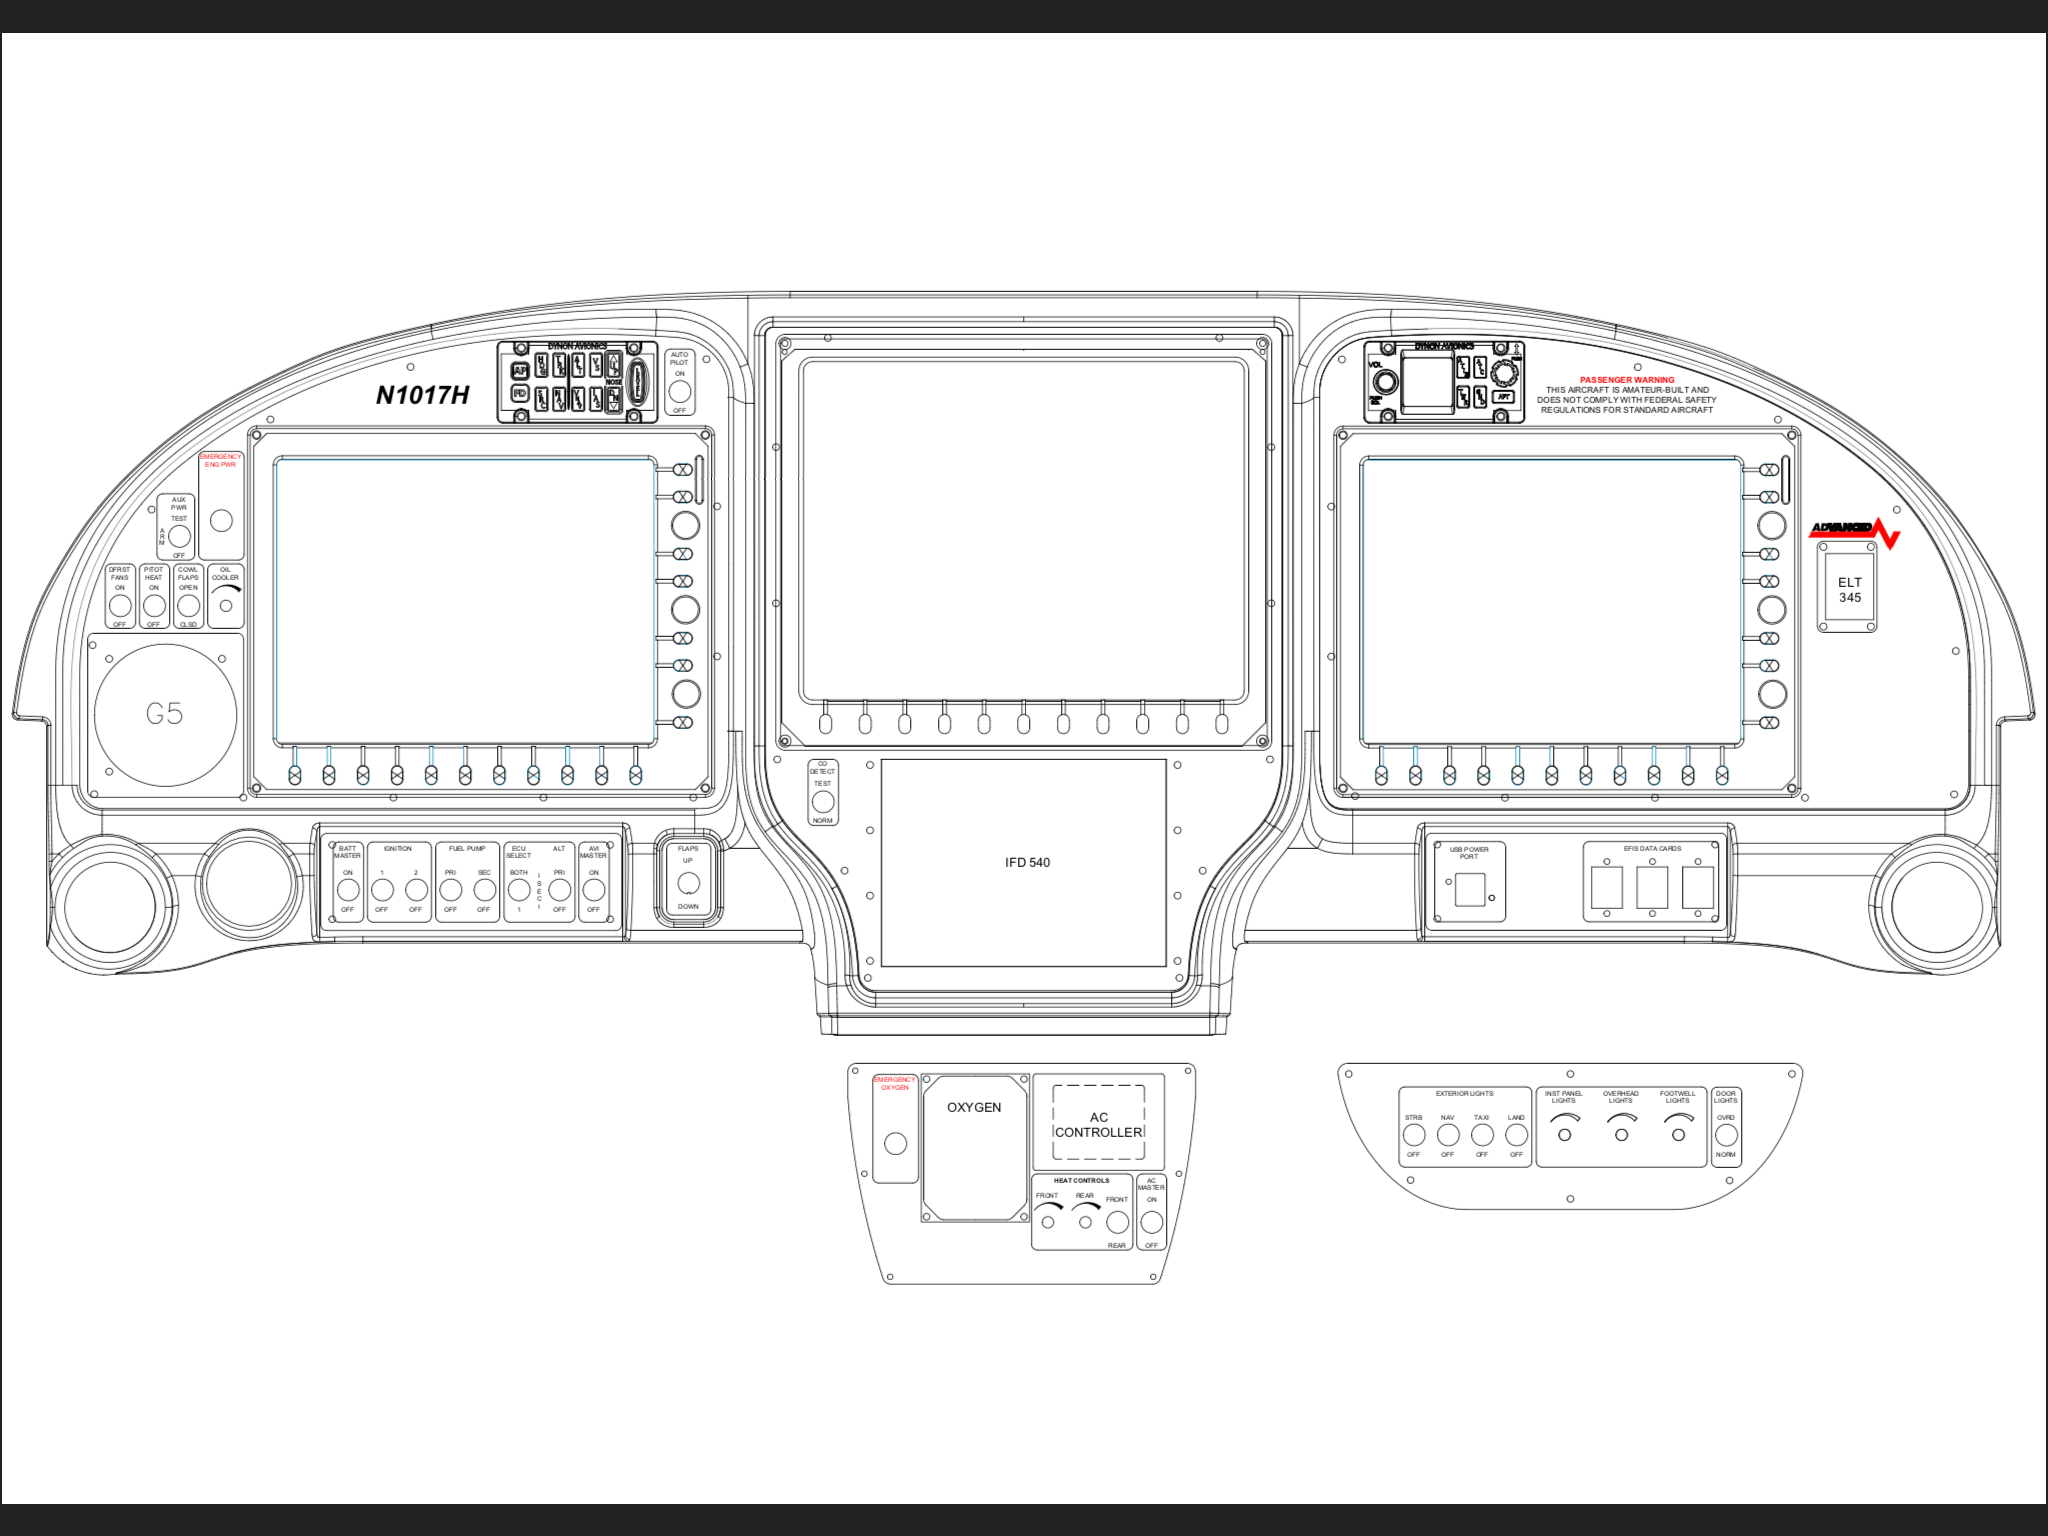
The space for the SDS control head is not ideal, but that instrument, should I go with SDS, is really only used during testing and tuning.  The EFIS will display all engine parameters for normal operations and I haven’t even decided if I’ll mount the display on the panel or remote mount it for use only when I need it.

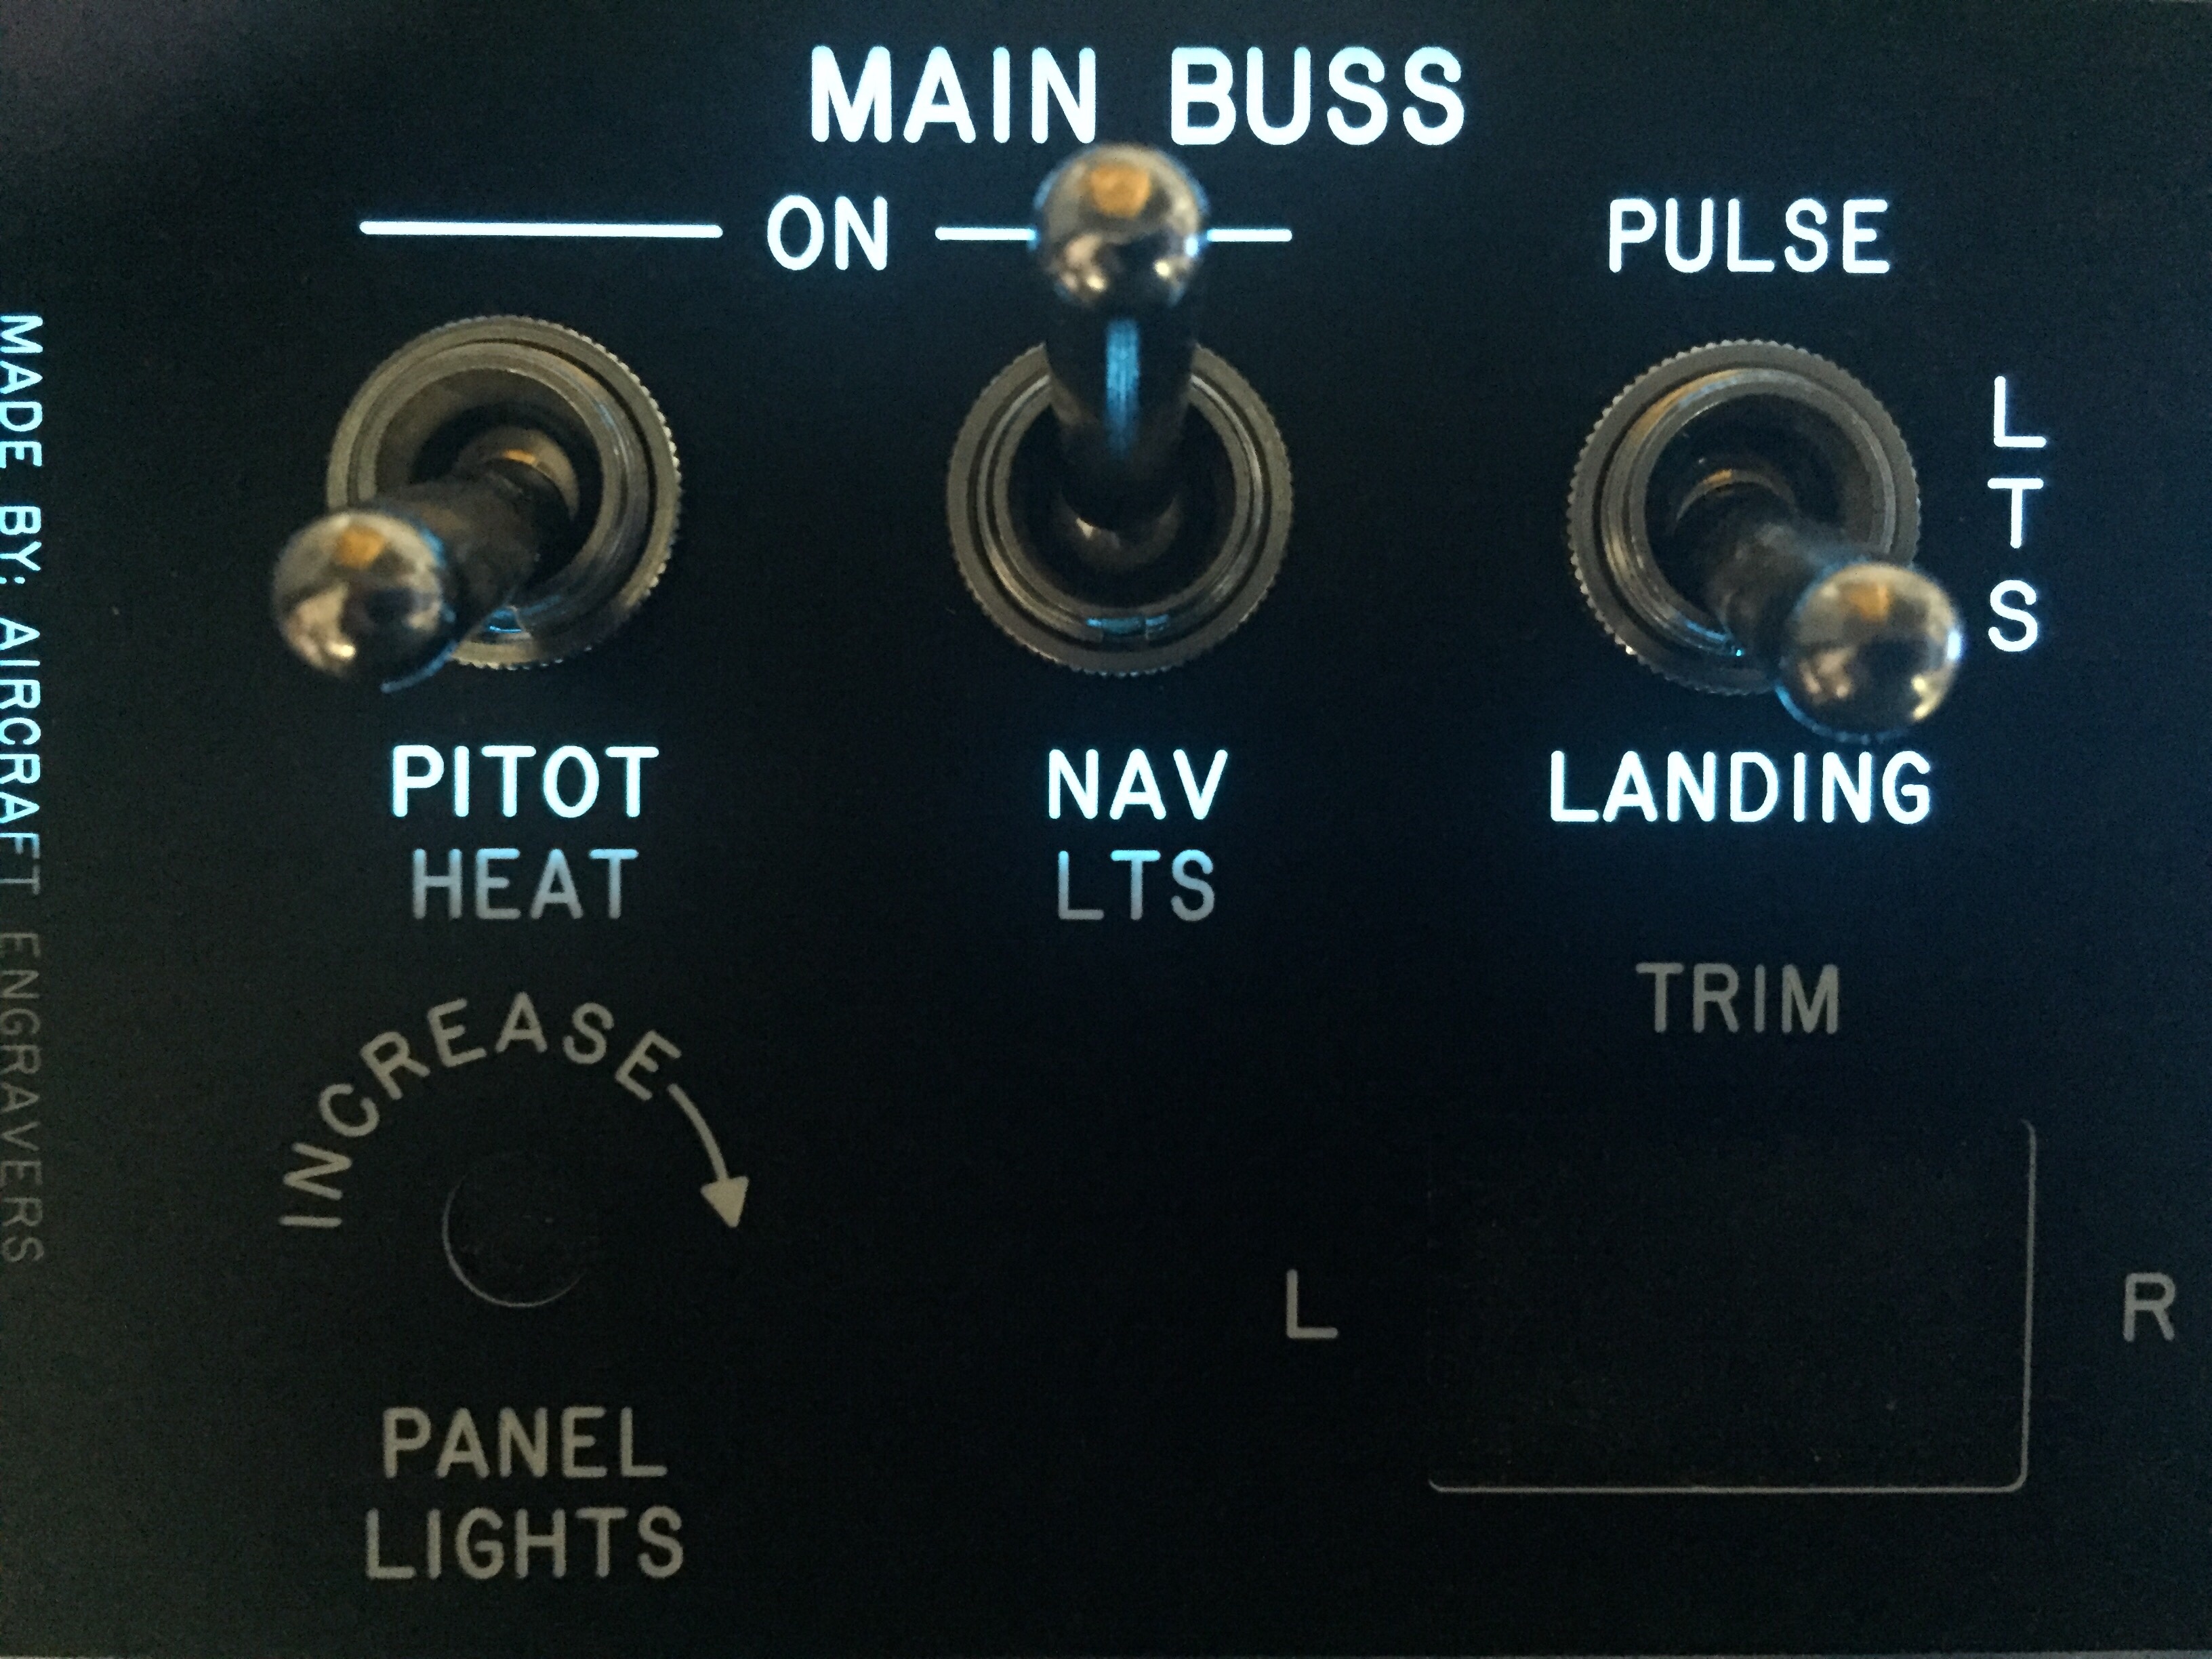
I do a lot of night flying and despise red dome lights or using a flashlight.  While all three screens and the GPS will put out a good amount of ambient glow, I wanted the switches to be properly backlit to add that extra pop to the panel.  While playing around on the internet looking for lighting solutions, I came across electroluminecsent or EL panels.  They are a really neat product, only about 1/32″ thick and available in many different sizes which are then trimmable with a few restrictions.  All run off of a 12V transformer and provide equal, dimmable, light across the entire surface.  Perfect for what I was wanting!

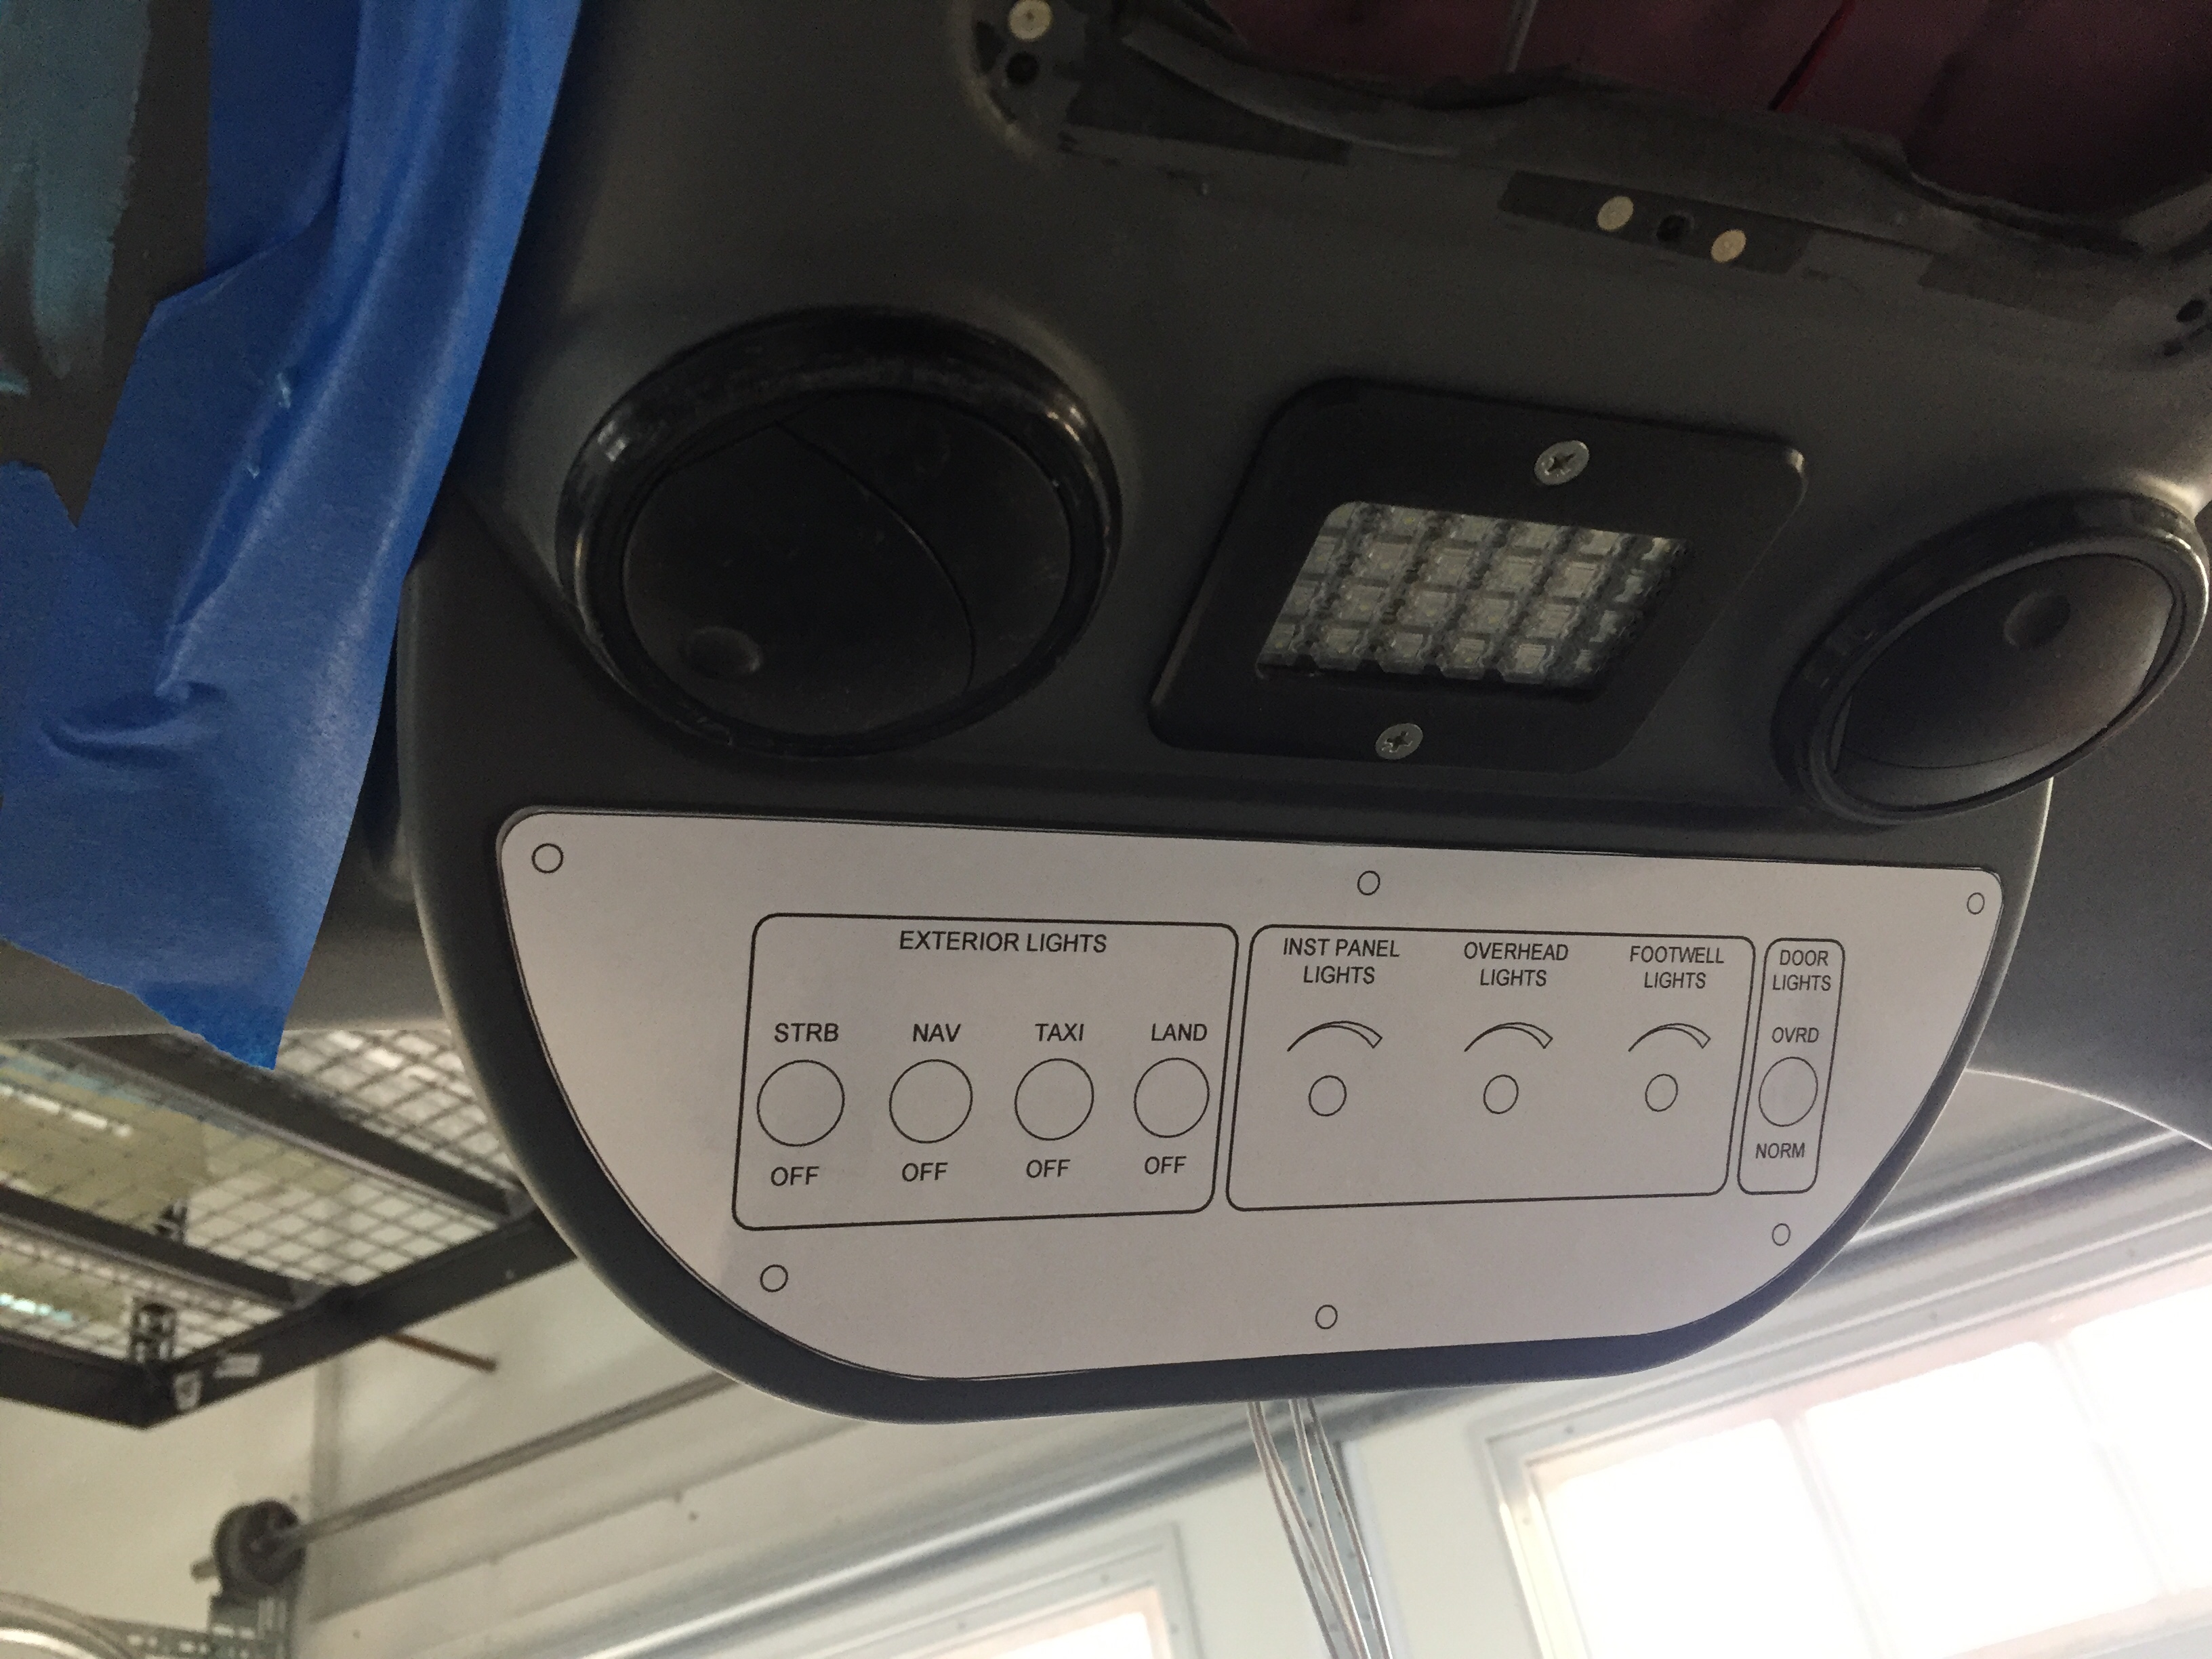
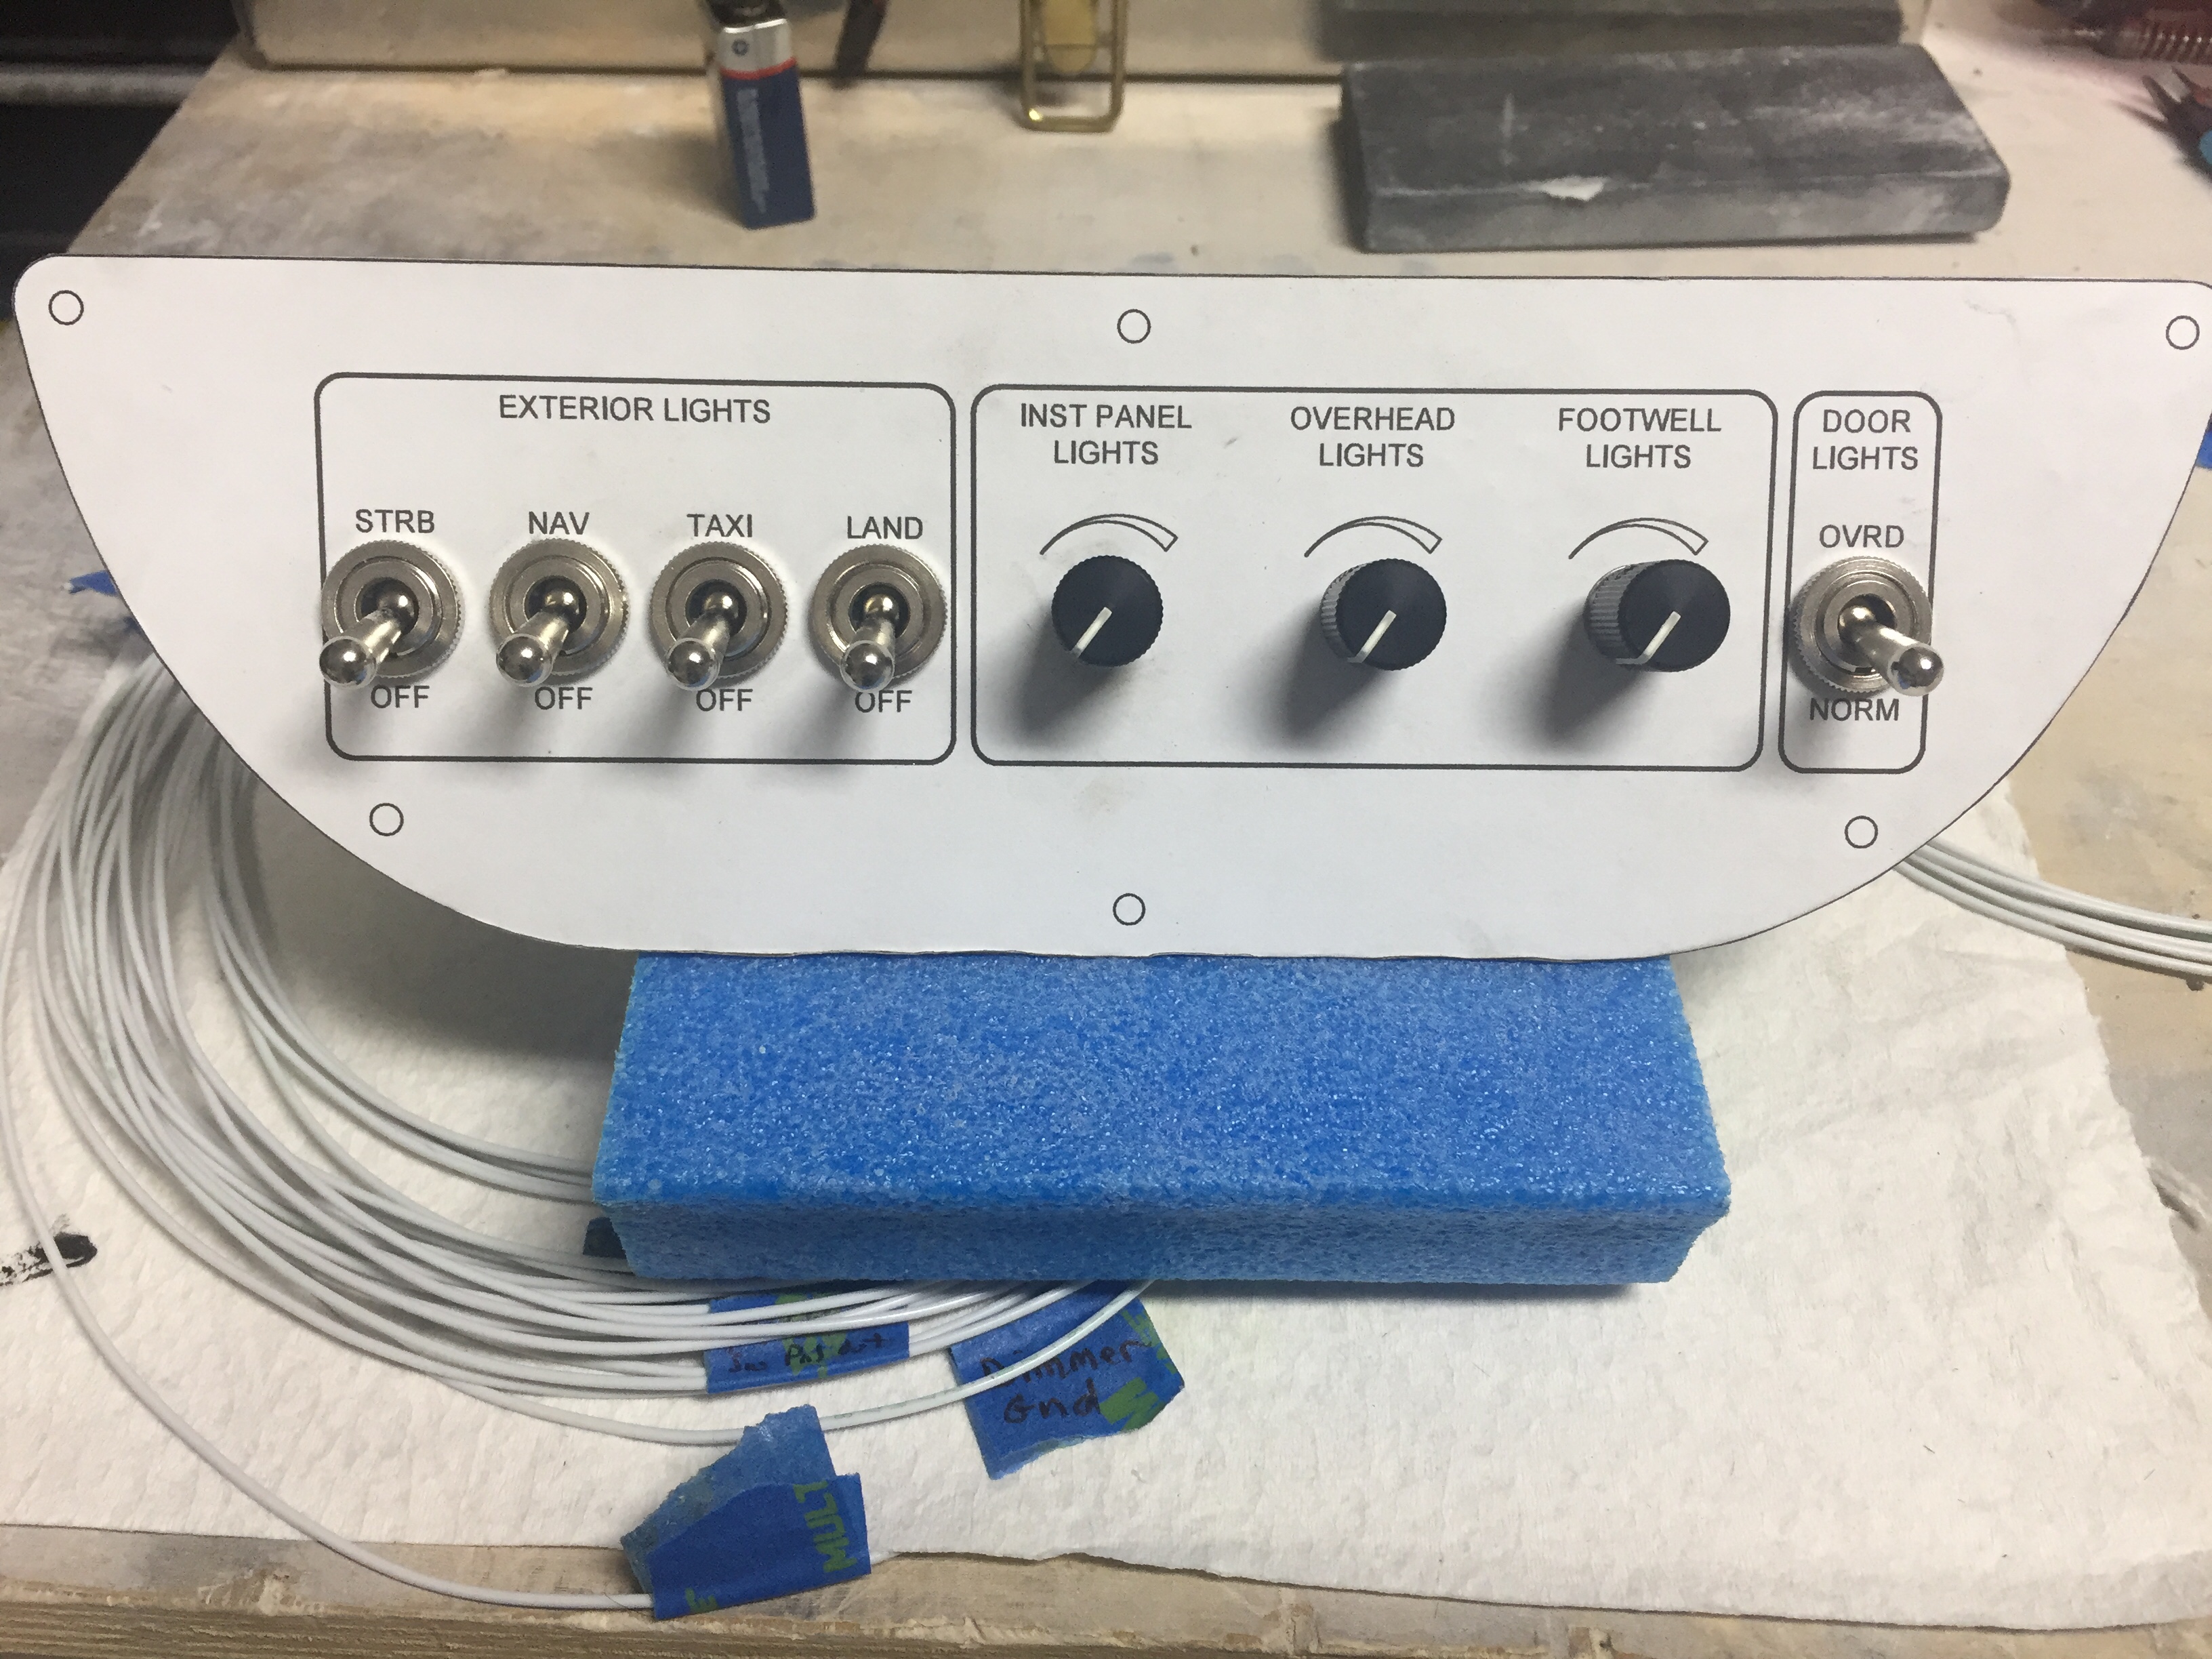
I ordered a test piece to experiment with in the shop and requested a sample of engraved acrylic from Aircraft Engravers.  Match made in heaven.  The EL panel glows nicely through the laser engraved markings and can be cut, trimmed, and hole punched for all of the switches and dimmers that need to go into the panels.  The transformer makes a bit of high pitch whine, but it will be drowned out in the airplane and a few flight tests in the Diamond confirmed that the transformer was not electronically noisy, only audibly so.
With a successful experiment, I set back to work in Draftsight to come up with templates to be cut and engraved by Aircraft Engravers.  AFS, who is building my panel, will still cut, paint, and label the four main panels.  This will be a presentable back up in case my EL project doesn’t work out in the long run.  I worked with an EL supplier from Etsy who has been awesome to get a proper prototype panel cut for the overhead console.  There are some limitations with the EL panels such as the power lead locations and two edges that have the contacts running along them not being able to be cut.  It was a bit of puzzle work, but in the end fairly simple to draft up and layout.  Aircraft Engravers cut and engraved the acrylic overlay for the overhead console panel and I was able to put it all together with switches to see how it looked.
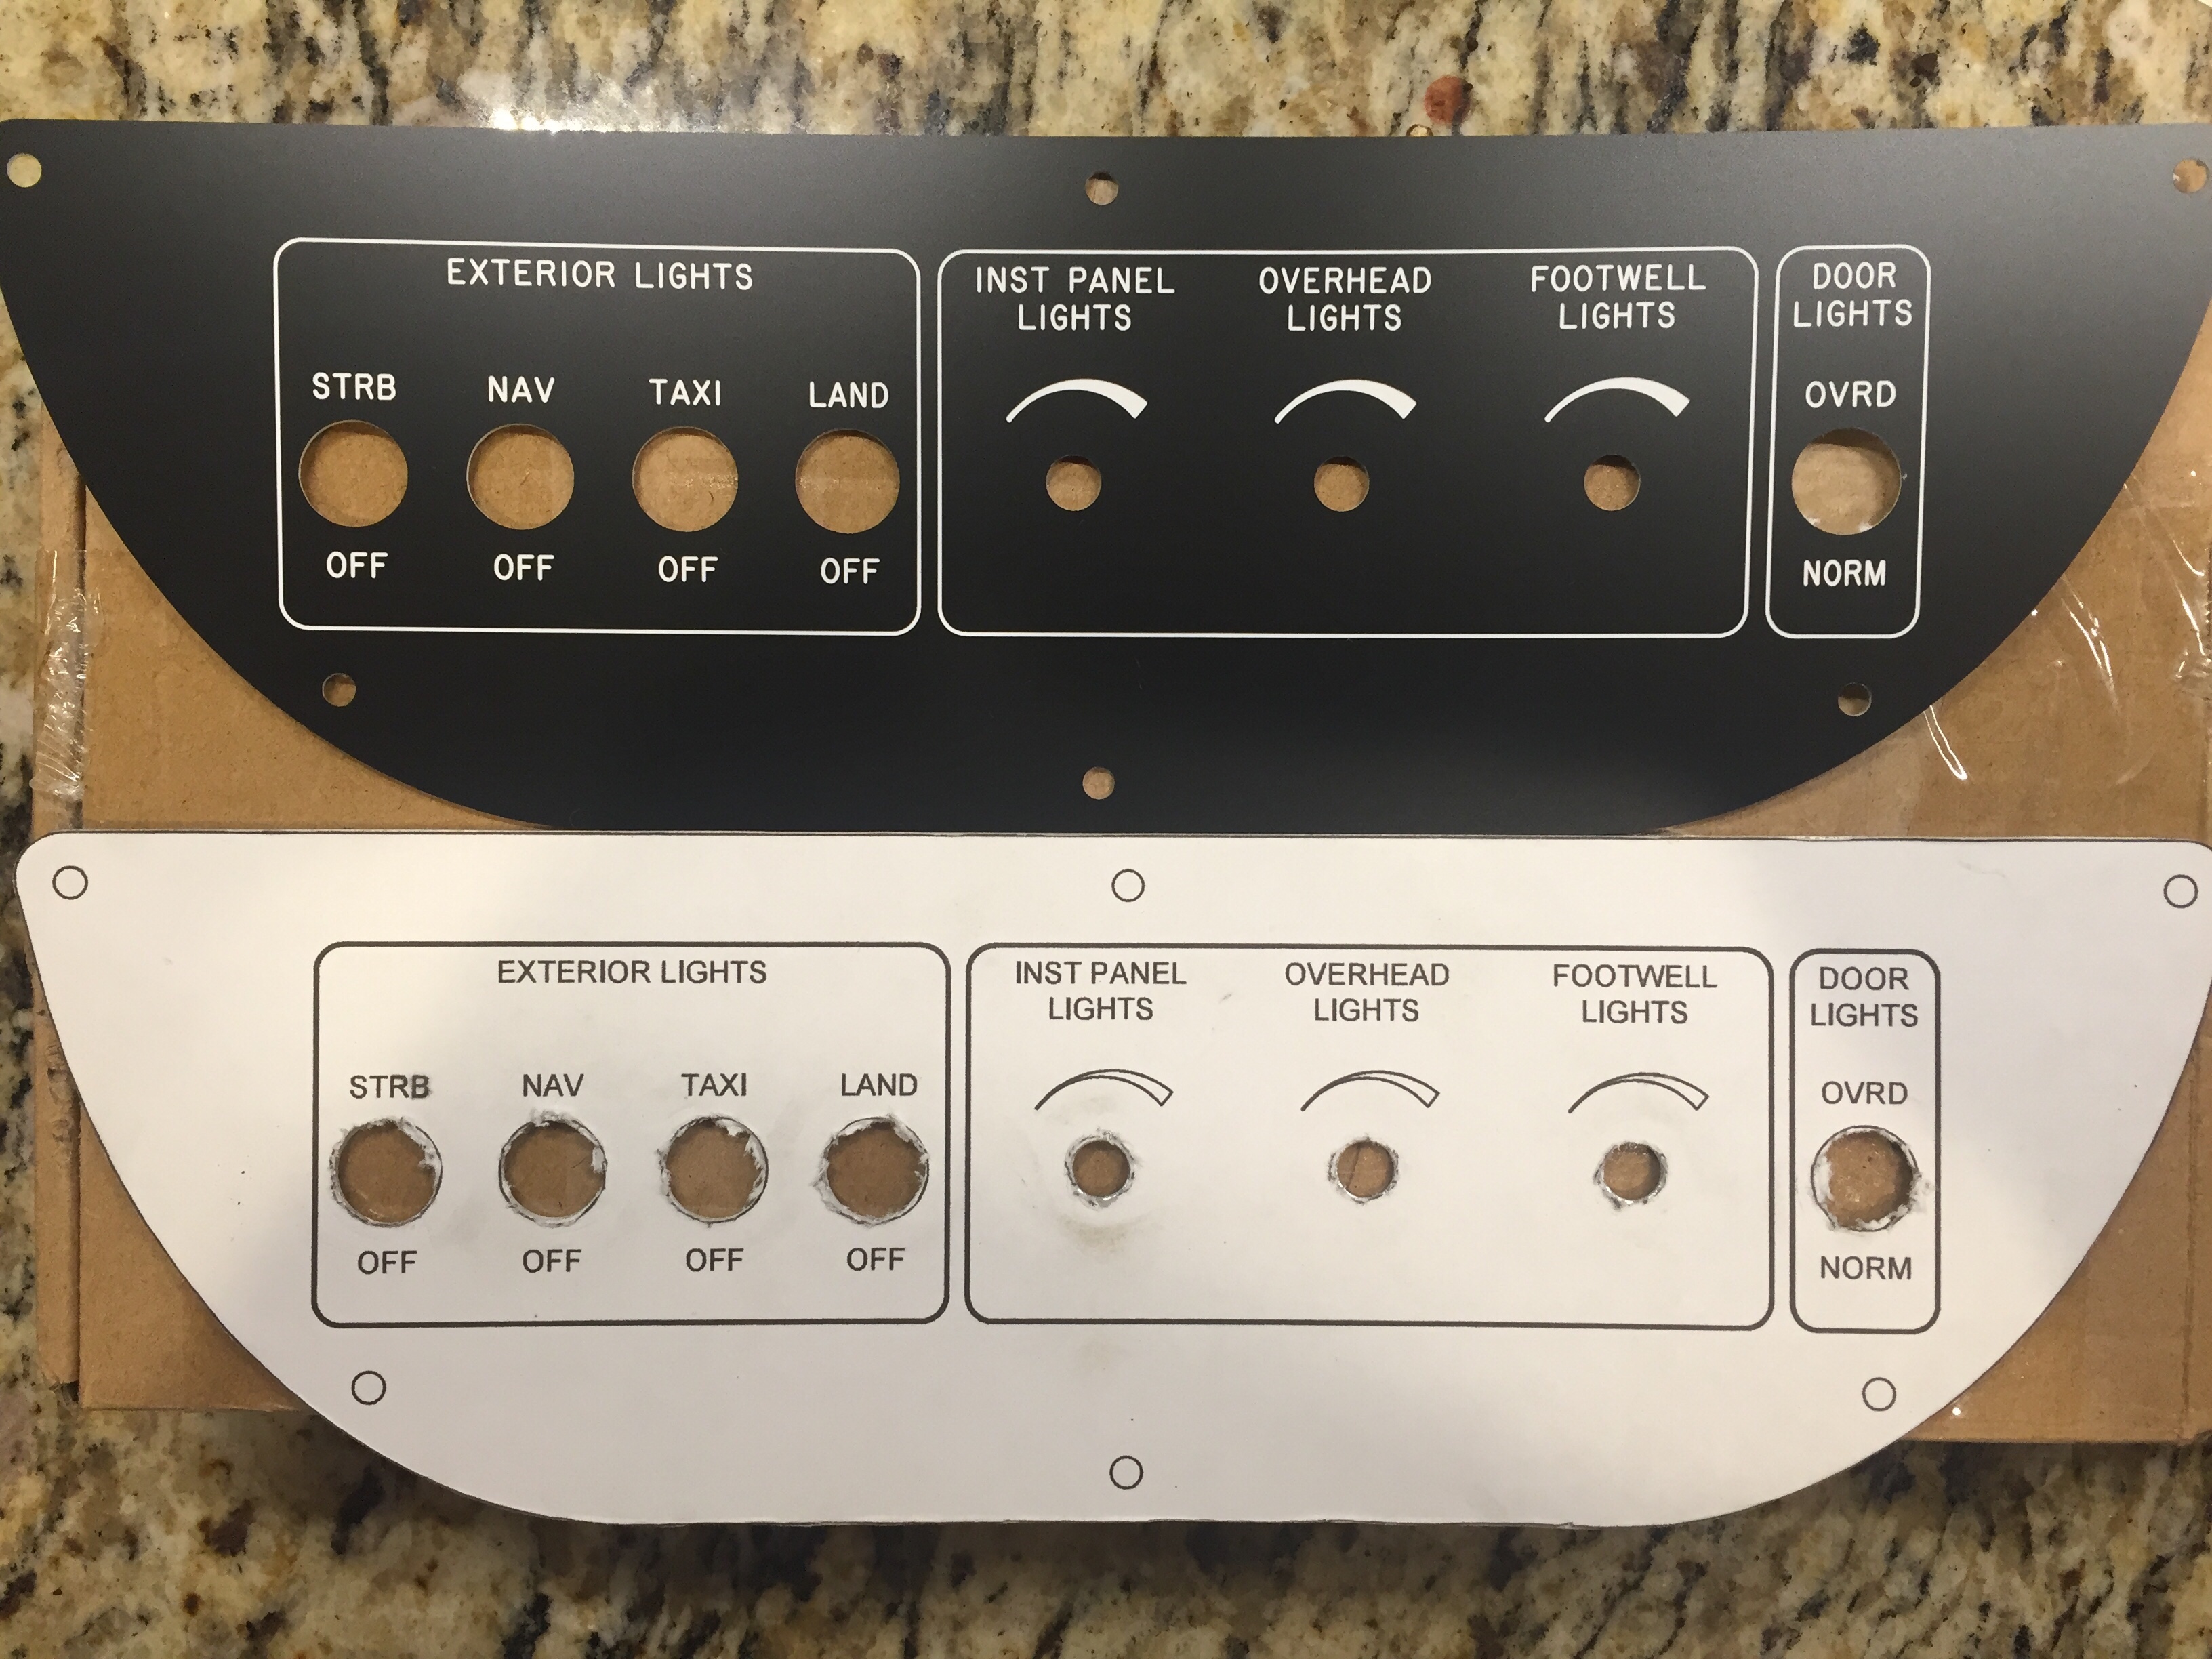
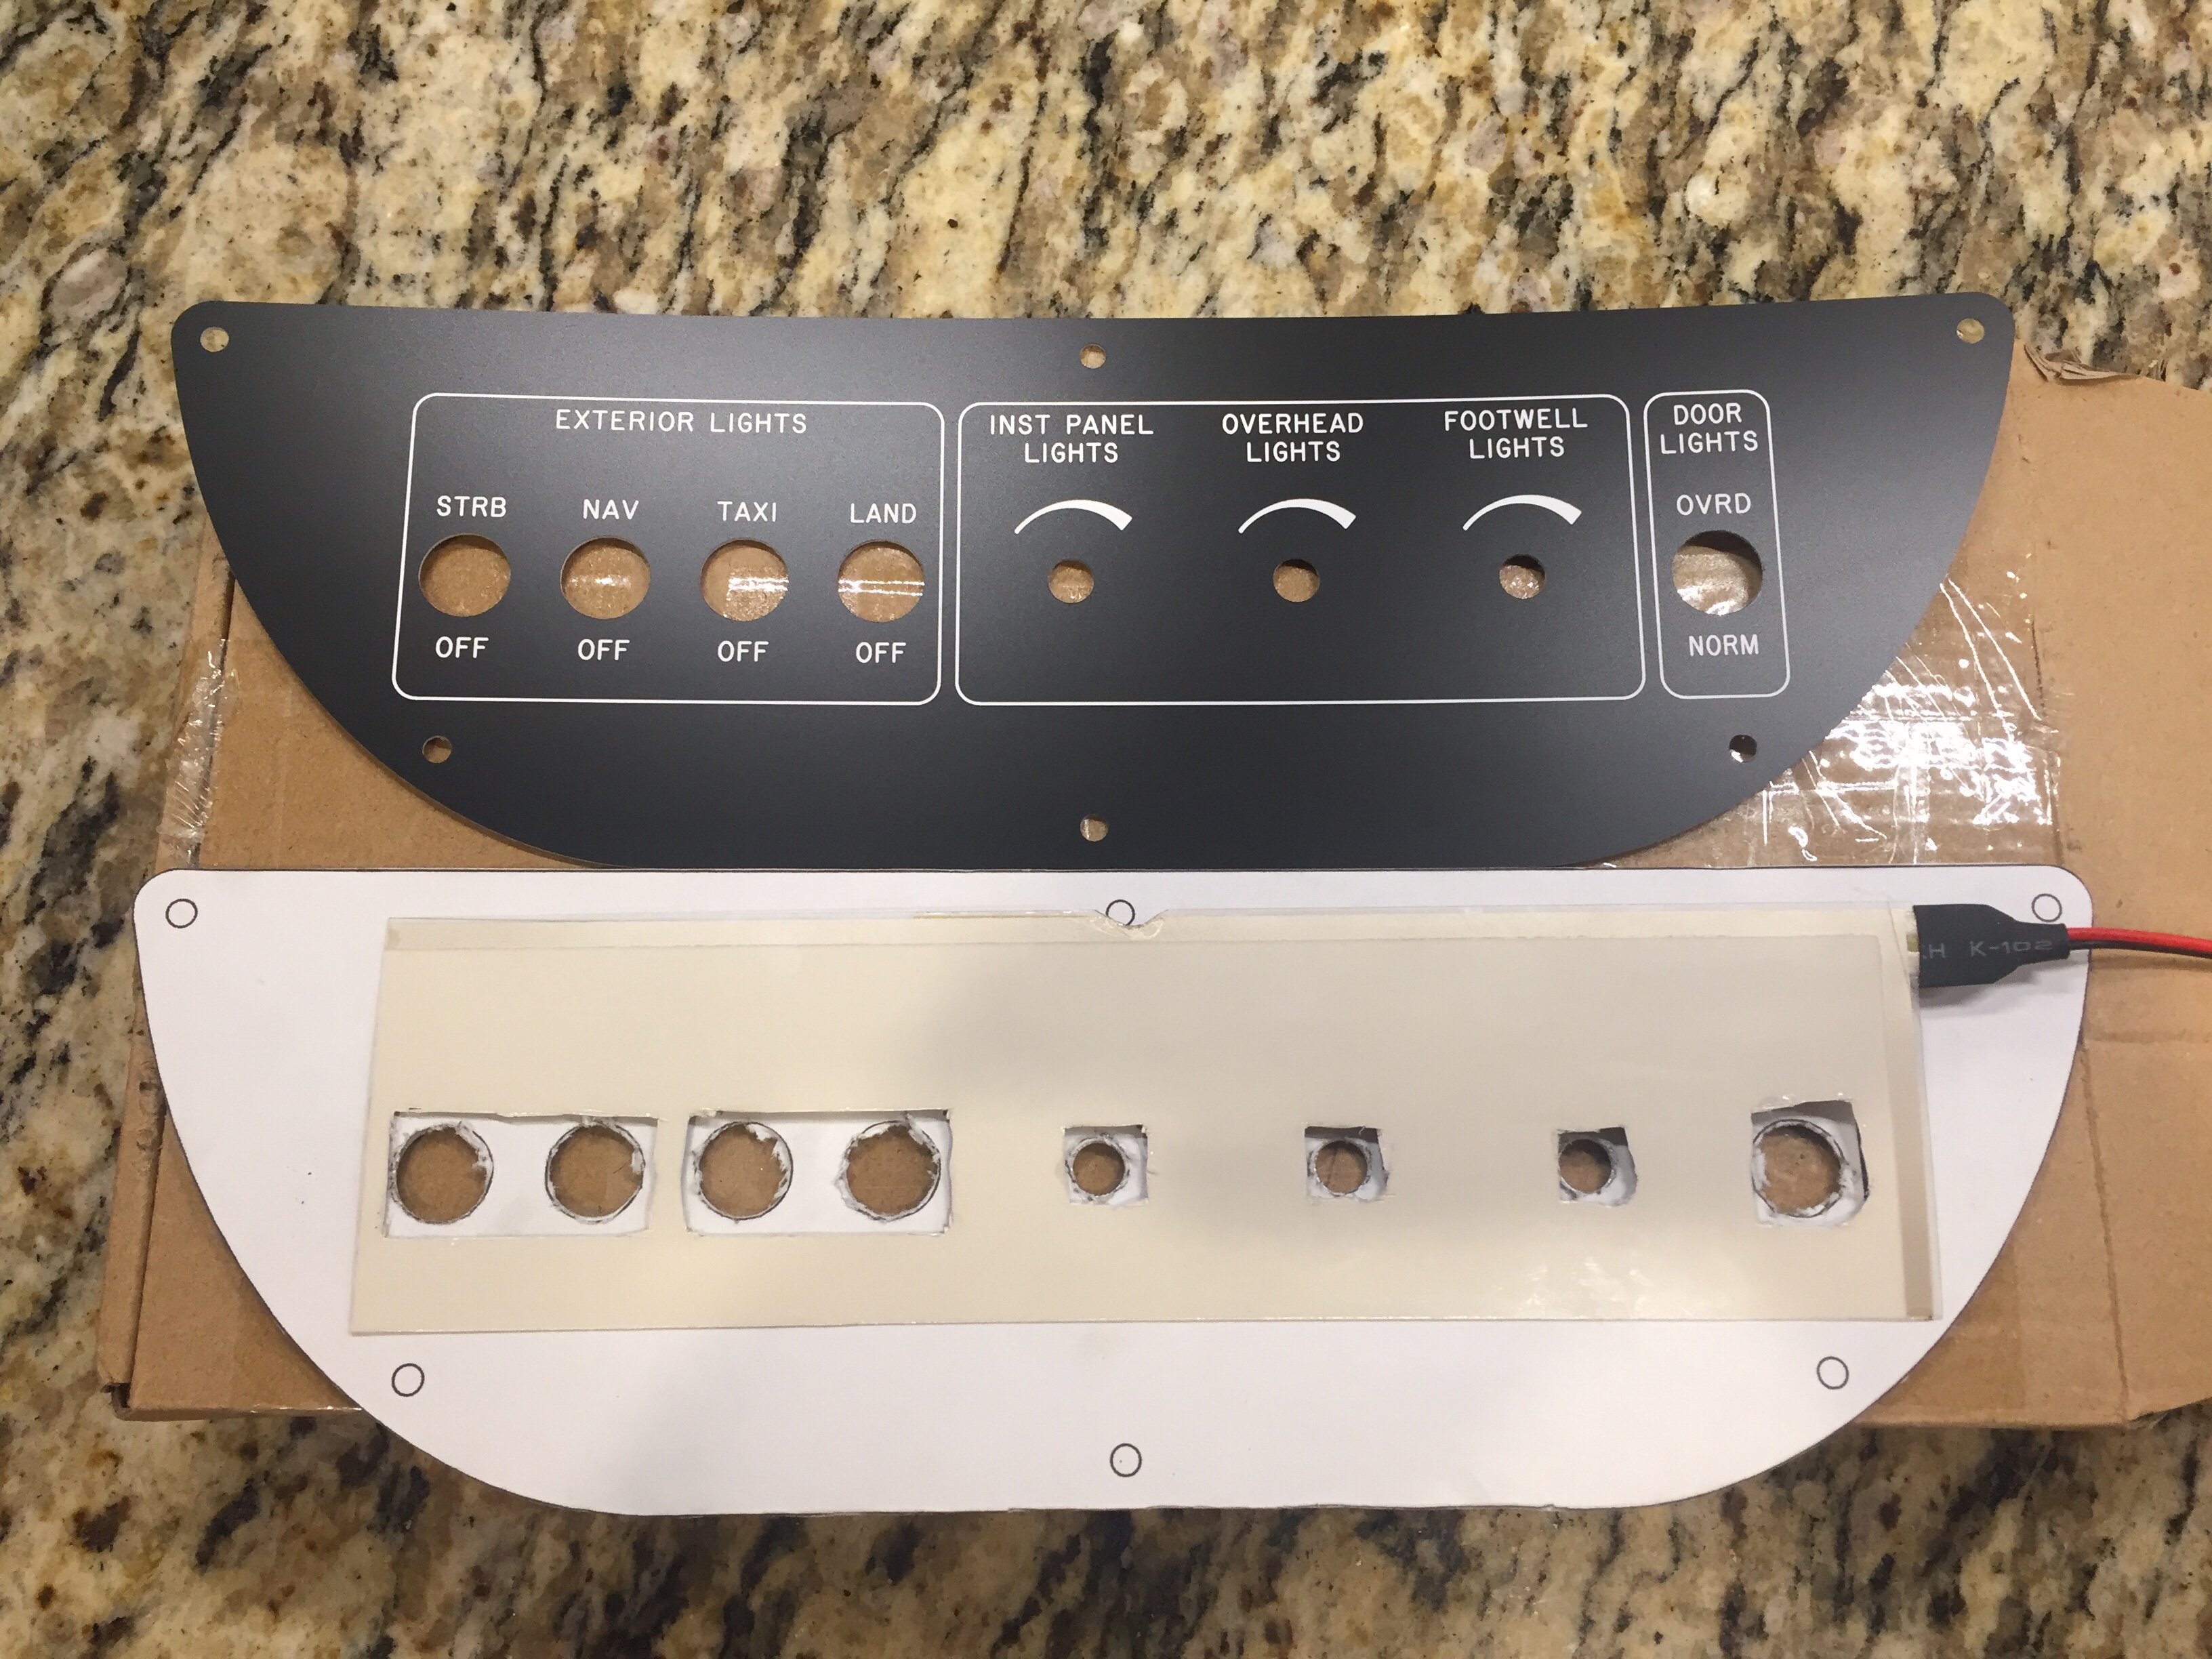
I was so excited that I forget to specify which color, so Marc sent white.  No worries, as the production version will be a blue.  Needless to say, I spent a lot of time sitting in the dark garage flipping switches that weren’t wired to anything!  It’s a very elegant solution and a rather easy one at that.  For the whole cockpit, all EL panels will be wired together with one transformer and be dimmable through a rheostat.  I wanted all of the instrument panel to match, so I’ll be spending some extra money on acrylic overlays for the entire panel rather than just smaller panels around the switches, but it’s my plane and I’ll do what I want to!  Wayne at Aircraft Engravers has been great and is pretty excited at this working so well, as he may be offering more panels like this in the future.

So now, I have finalized the lighting panels and overlay panels for production.  I’m hoping the avionics arrive on time at the end of February for me to finish wiring and installing.  With my higher level of customization, I’m not using the AFS quick panel switches so I’ll have a bit more work to do than most quick panel customers.  I’m very grateful to Rob, Stephan, and all of AFS for hanging in there with me on this over the top instrument panel.  In the end, I’m confident I’ll have a real show stopper that I’ll be admiring for decades to come.

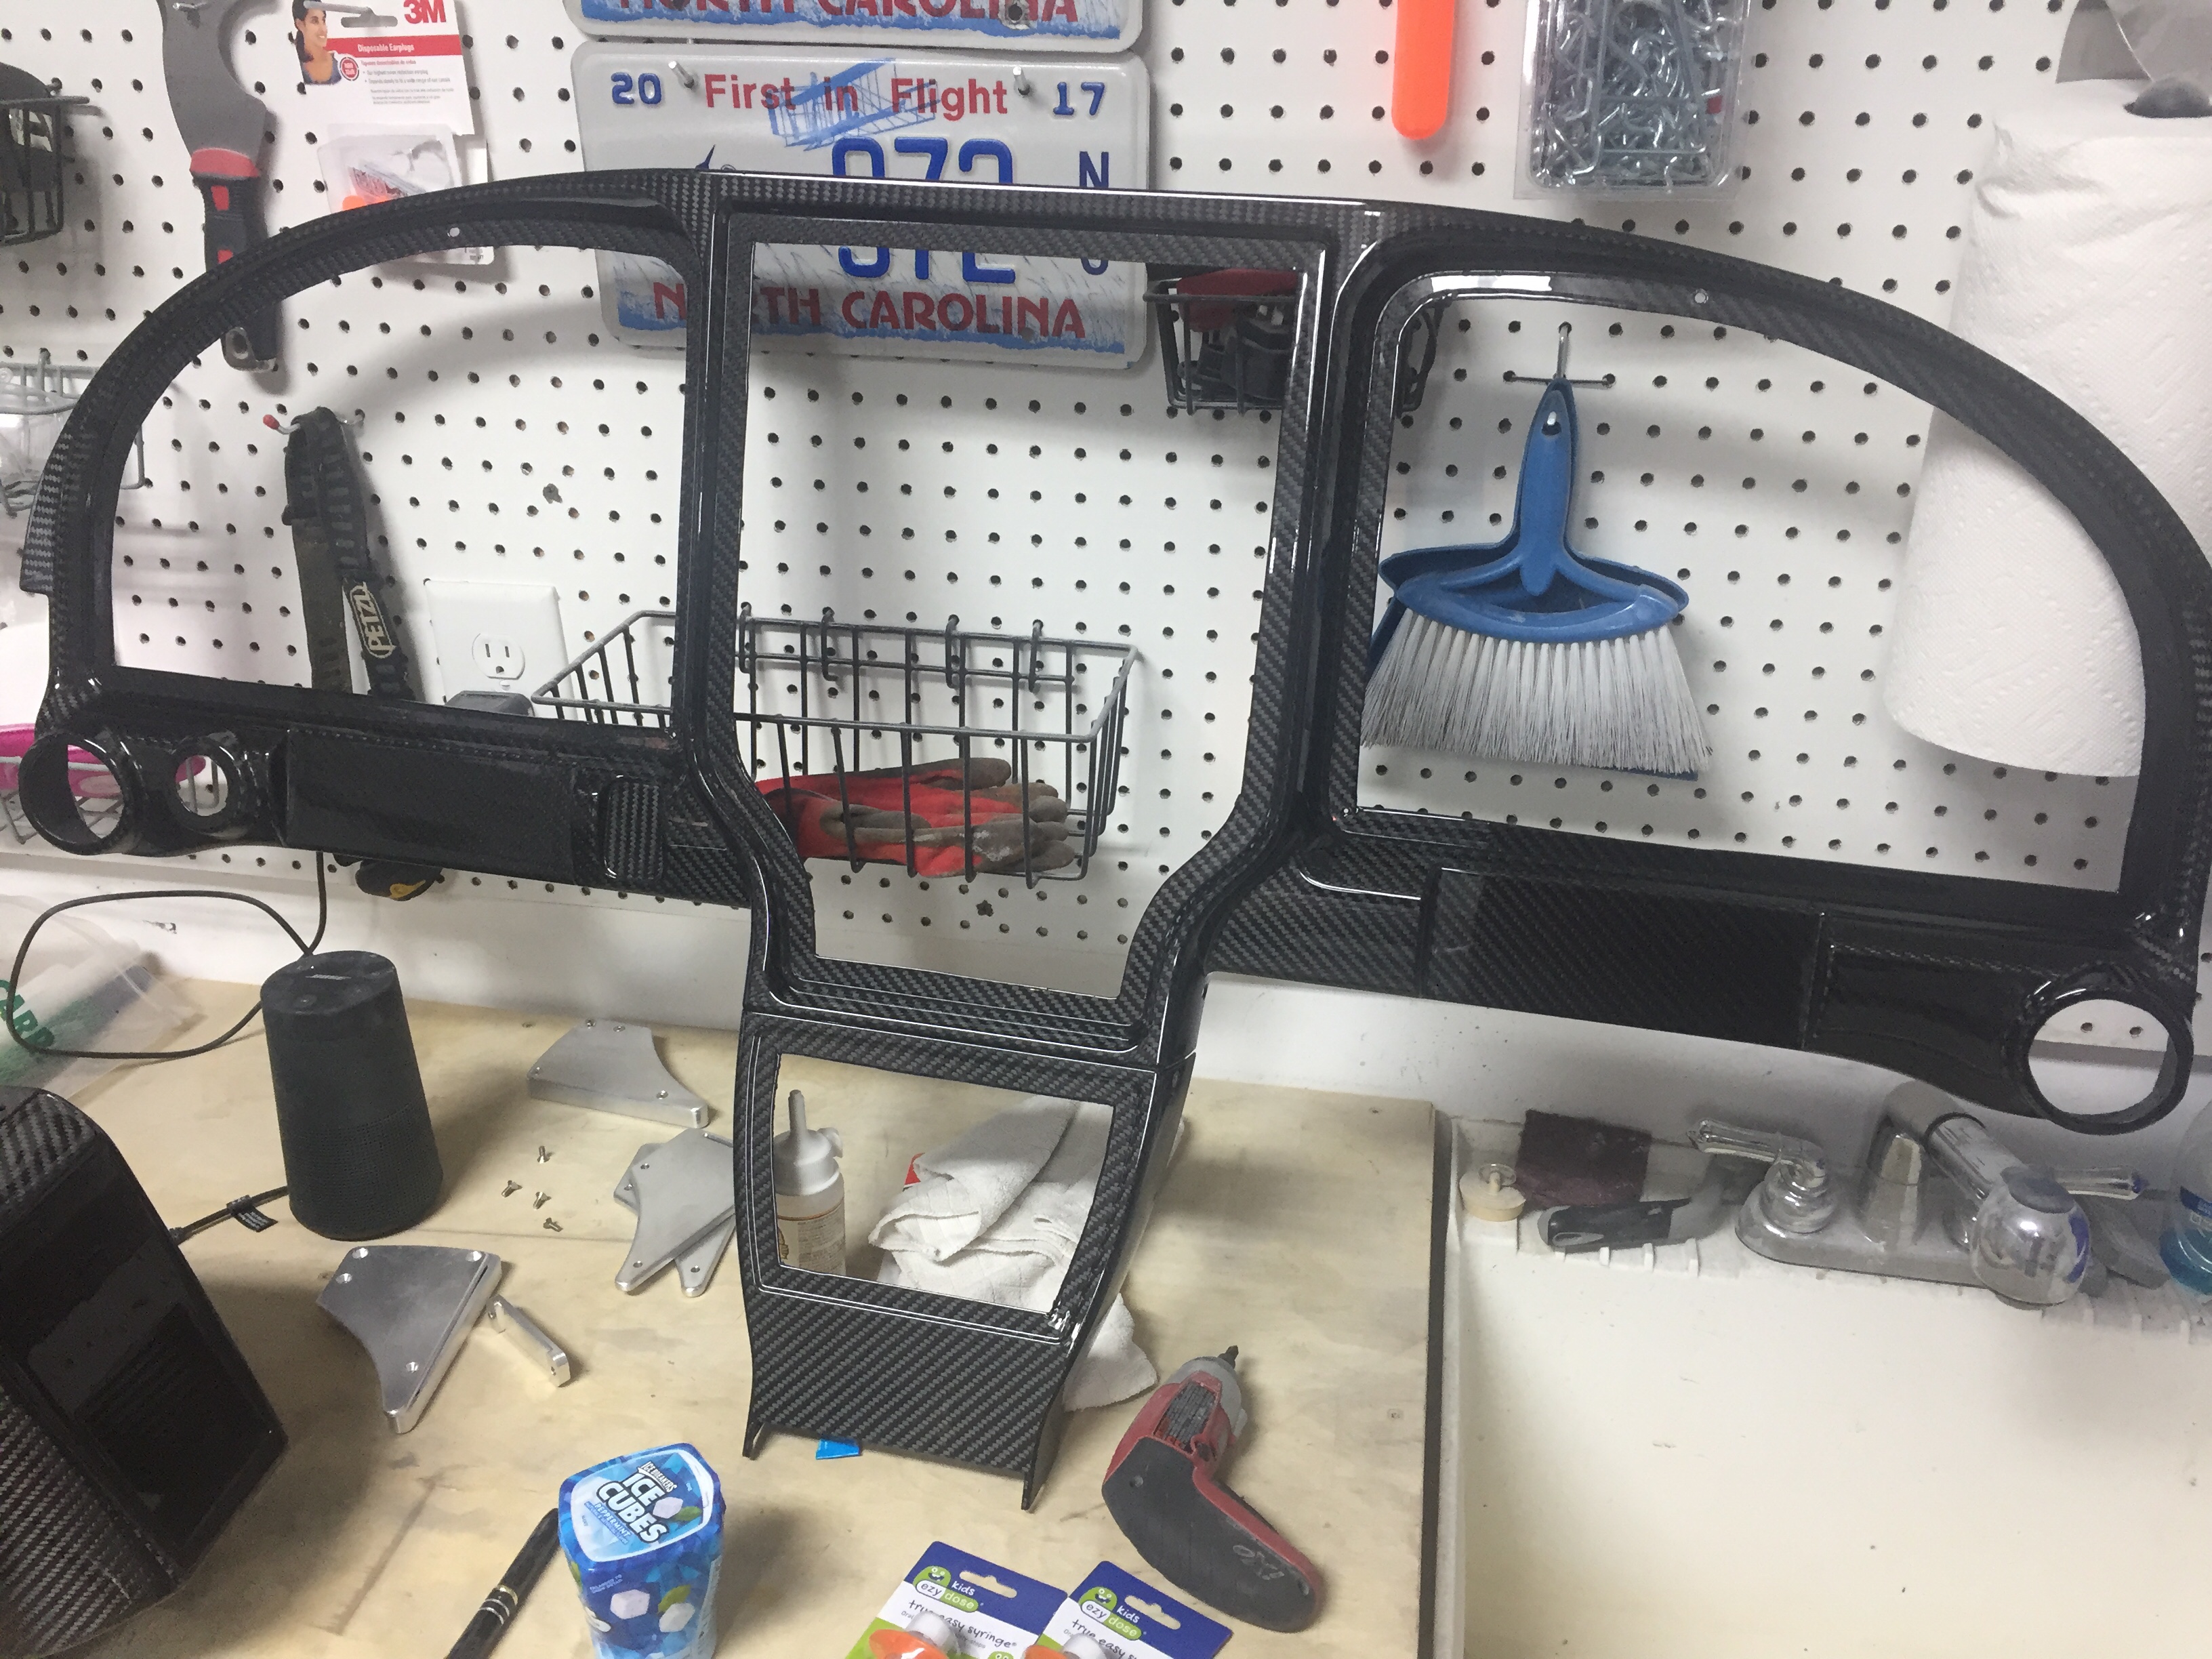
I love shiny things

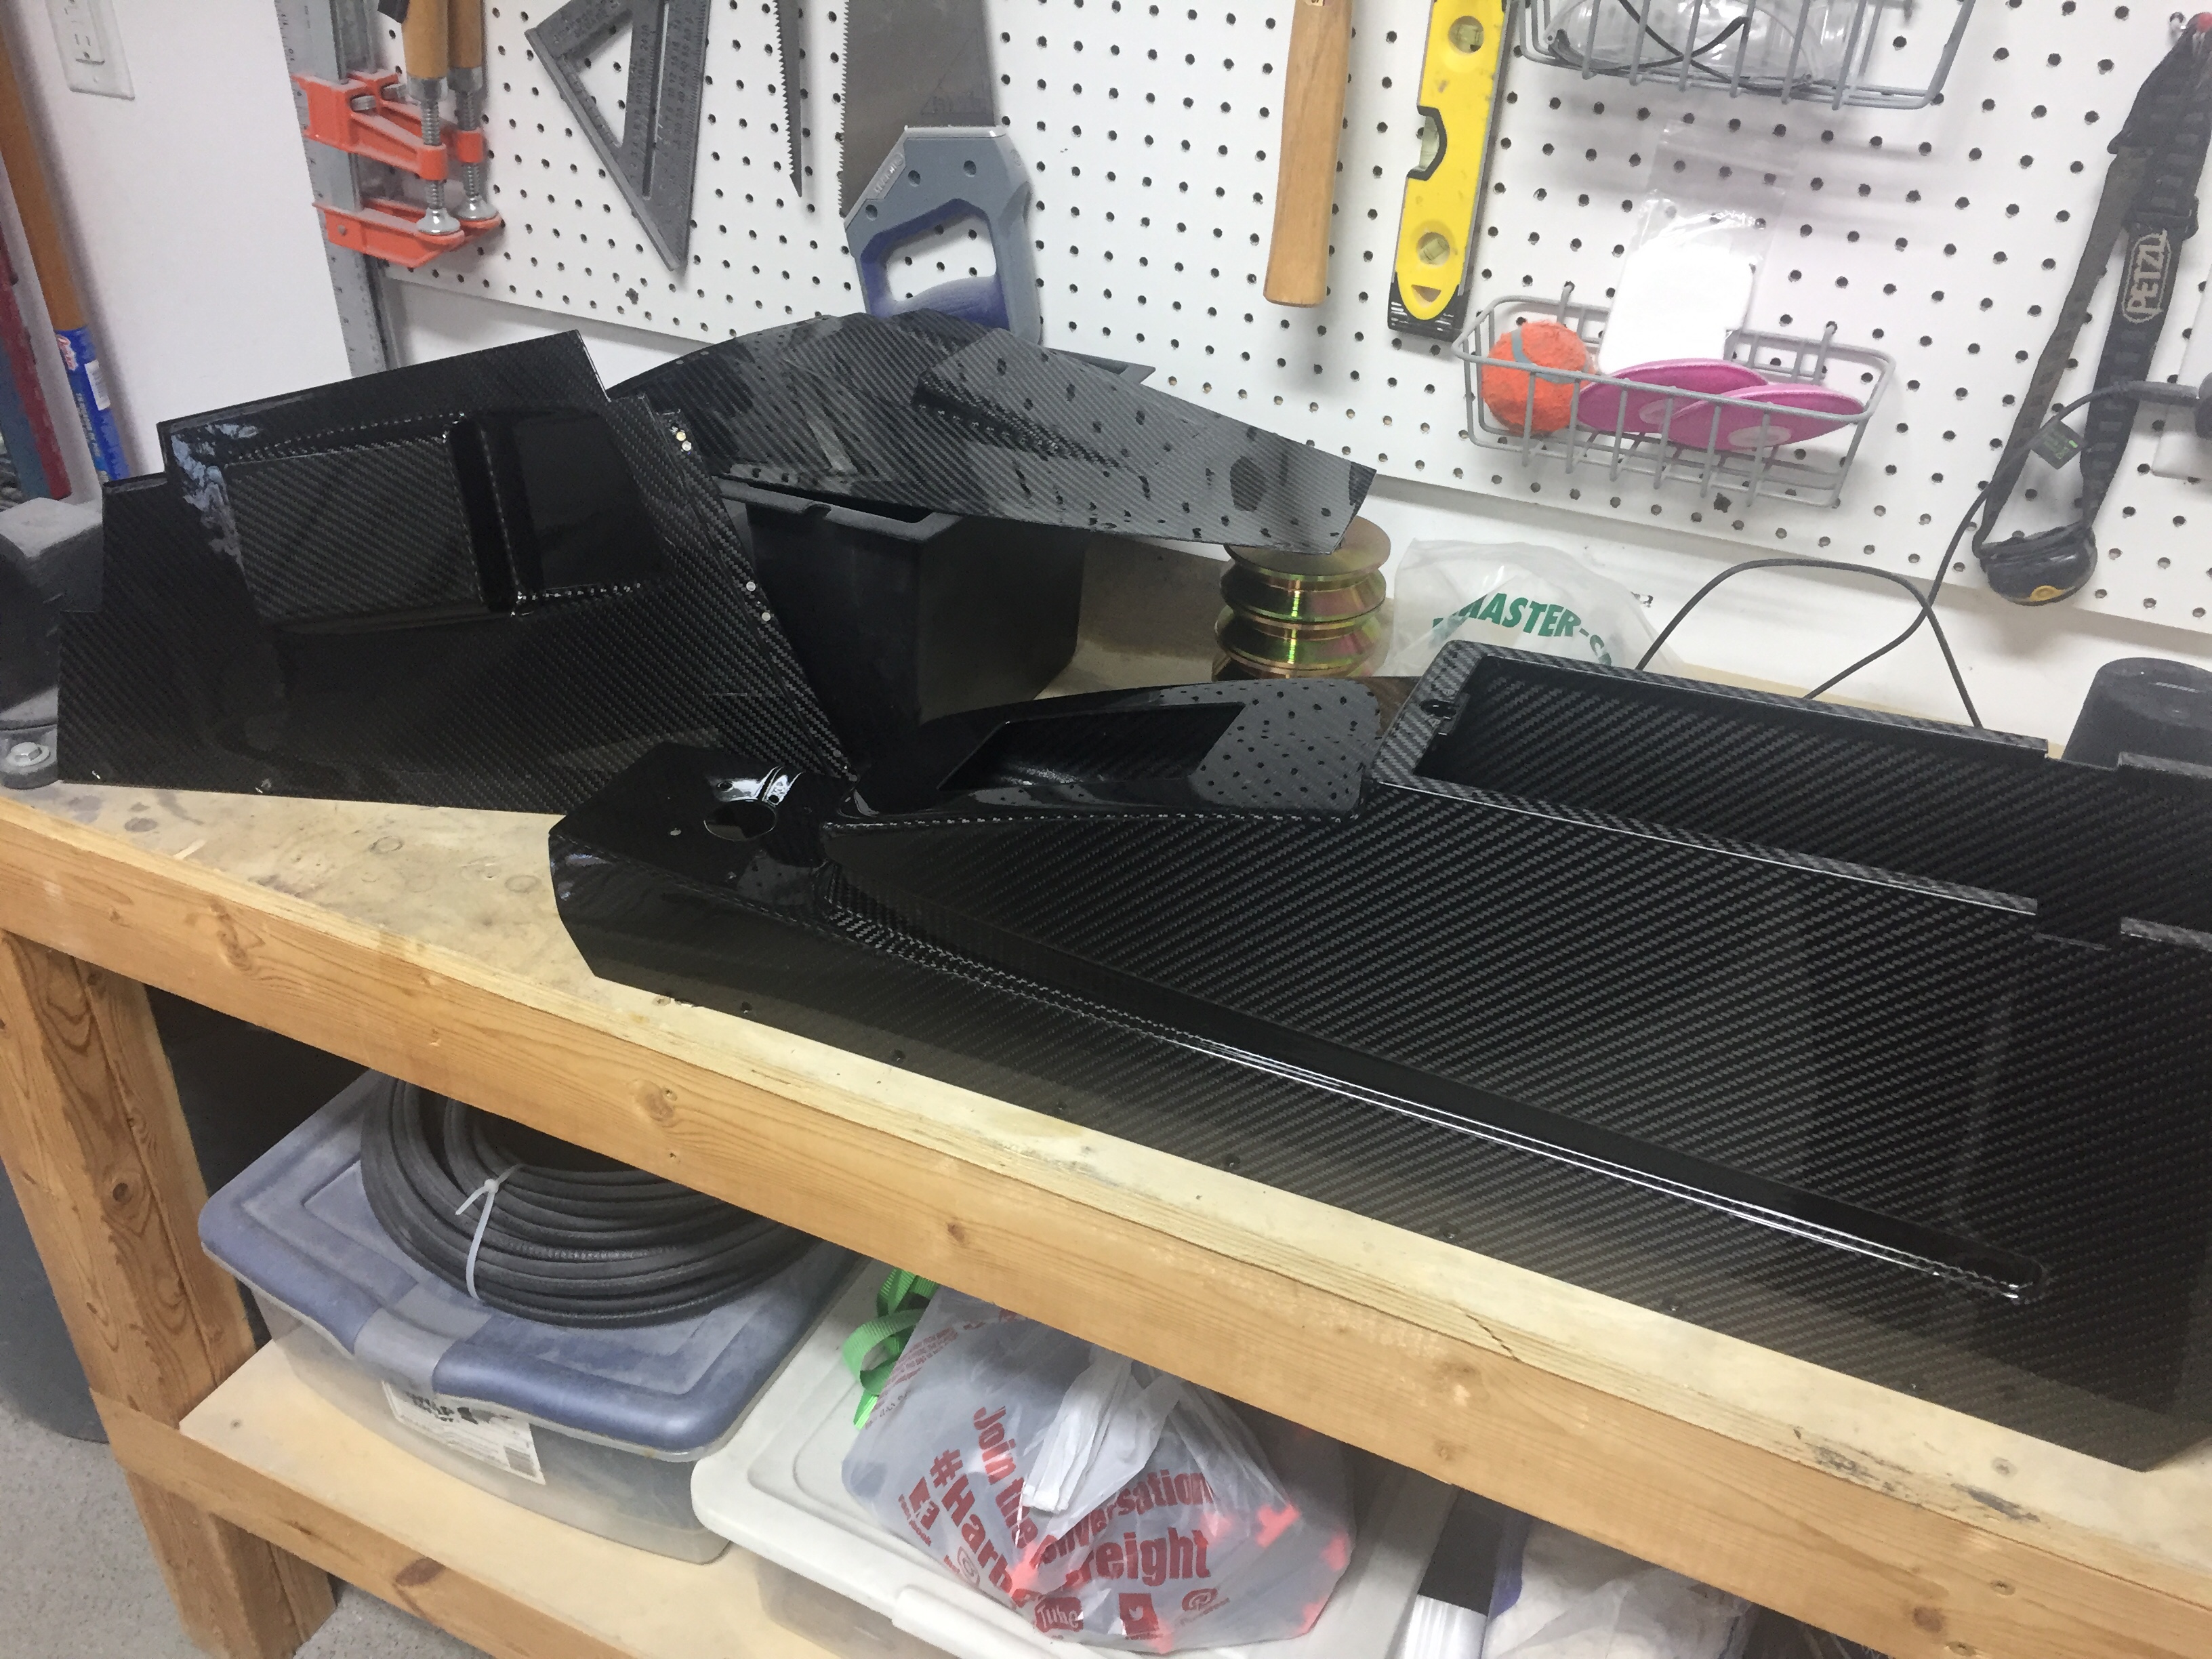
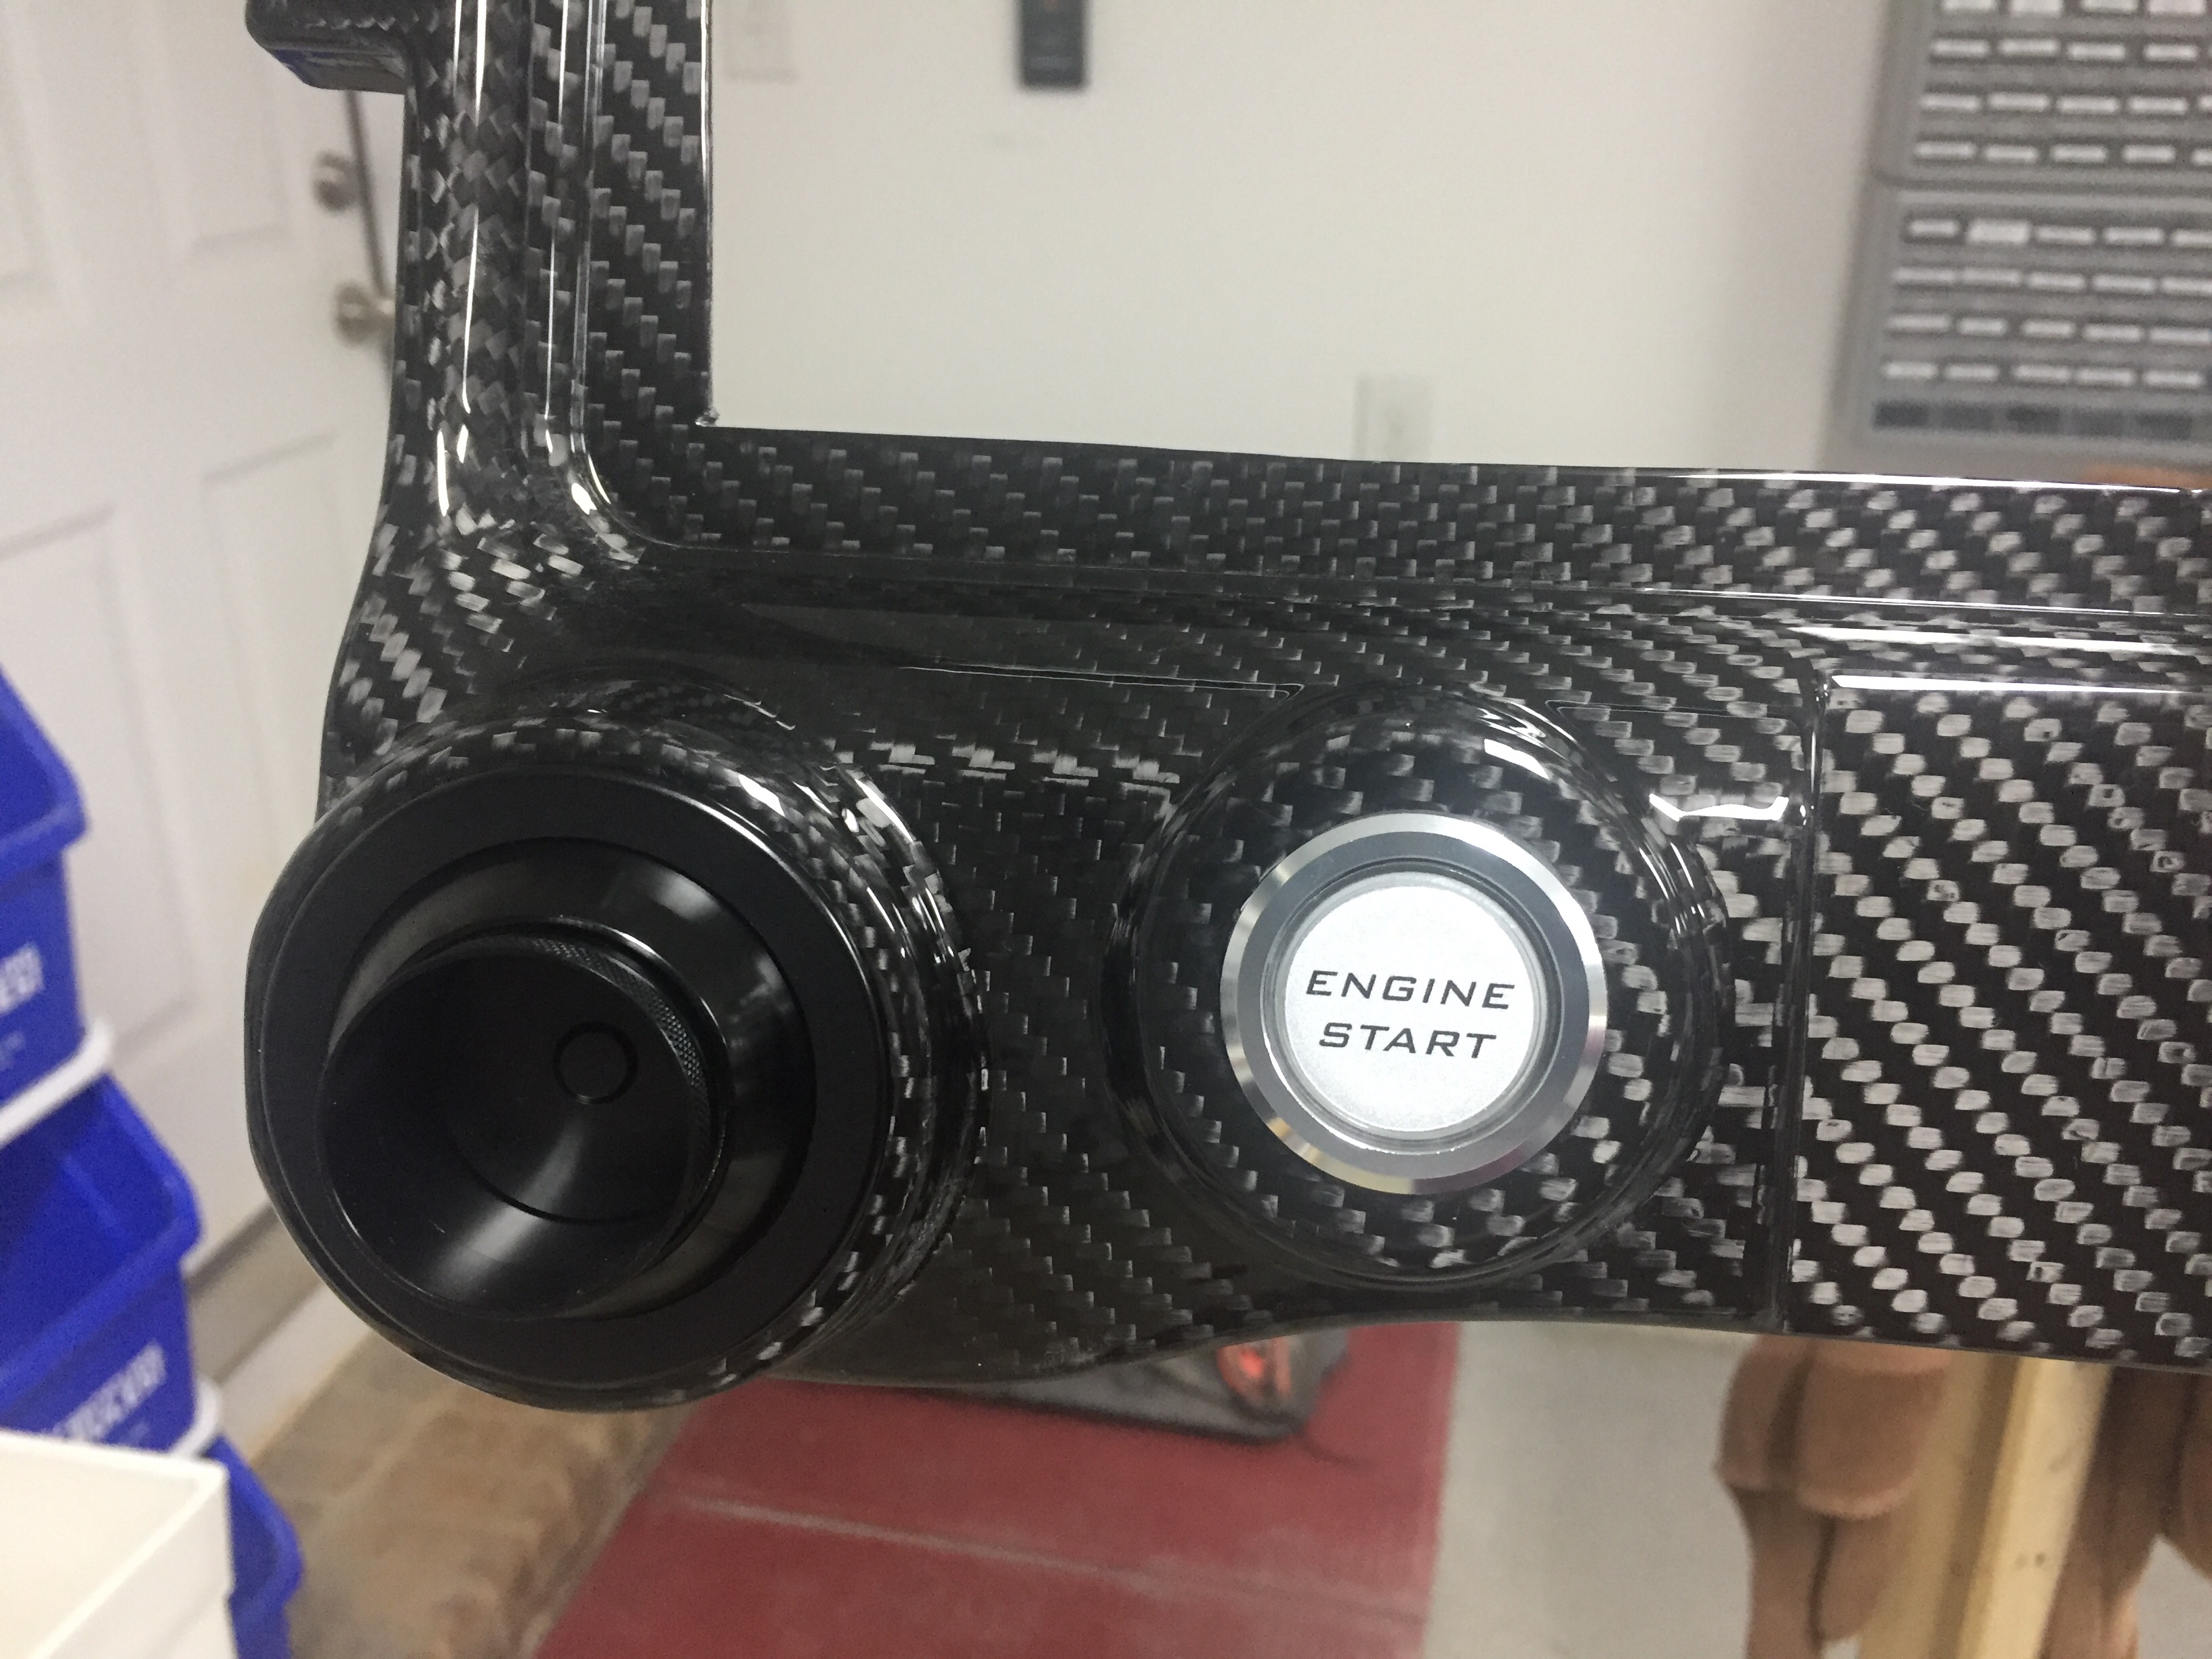
While the doors were being worked, I picked up the carbon fiber parts that were at the painters getting clear coat sprayed.  I was smiling ear to ear walking out to the car with them.  The pieces turned out better than I had imagined and are darn near perfect.  The painter put two coats and while it has a nice gloss reflection, it’s not overly shiny.  The carbon really comes to life with the clear over it and I think it’s going to look great in the cabin.  I now regret painting the overhead instead of clearing it.  I have made up my mind if I ever have issues with the paint on the overhead, I’ll strip it and clear the carbon portion without a second thought.

At home, I had to put the push to start button and Aero Vents in to see how it looked and make airplane noises.  Some hours later, I got back to work printed out a few panels to see how things were going to fit and look.  I’ve been working for over a year on my instrument panel layout, playing with this and that, moving things around, and finessing the position of switches, etc.

I started with Panel Planner and really liked it for the ease and simplicity of it.  It is great at putting components in the panel and seeing what it will look like with all the fancy touch screens everywhere.  What it’s not good at is custom anything.  I never could figure out proper switch labels and the 310 switch panels weren’t loaded into the panel template, so I just stuck with the main layout on there.

Meanwhile, I reached out to Rob Hickman at Advance Flight Systems (Dynon) with a few technical questions about the AFS system.  We had a couple great conversations that led to him providing a quote for a “quick panel” customized to my liking.  Surprisingly, he was able to quote a complete panel far less than just the components from Stein!  I had planned on doing all of my own wiring, but I couldn’t pass up this opportunity and deal, saving me money and time.  I started working with Stephan on the layout and wound up using Draftsight Plus at his recommendation to do more detailed drawing on the layout.  I decided to give poor Stephan a break and finish the final details myself as it was just easier and I’m a control hog.  Draftsight is based on a version of Autocad that I used back in high school so I was able to pick it up really quickly.  It’s also much easier and simpler than SolidWorks, as I don’t need computational fluid dynamics to label the Defrost Fans switch and put borders around switches.

The switch panels, upper, and lower console panels turned out great and were a good fit.  I was able to confirm the lack of need to reach across the center console for anything I’ll need in the cockpit except for activating the ELT, a major goal that I wanted after flying the DA-40 and constantly using my right-seater’s knee as a armrest.  Since I had already ordered the Apem toggle switches and Pilot Lights dimmers, I decided to mock up the overhead panel to finish the night off with more flow work and airplane noises.  I admit I’m pretty giddy about getting controls in the cockpit and I’m really happy with how they layout is working.  I can’t wait to get the panel and avionics from AFS installed to light everything up!

Kool like Krantz

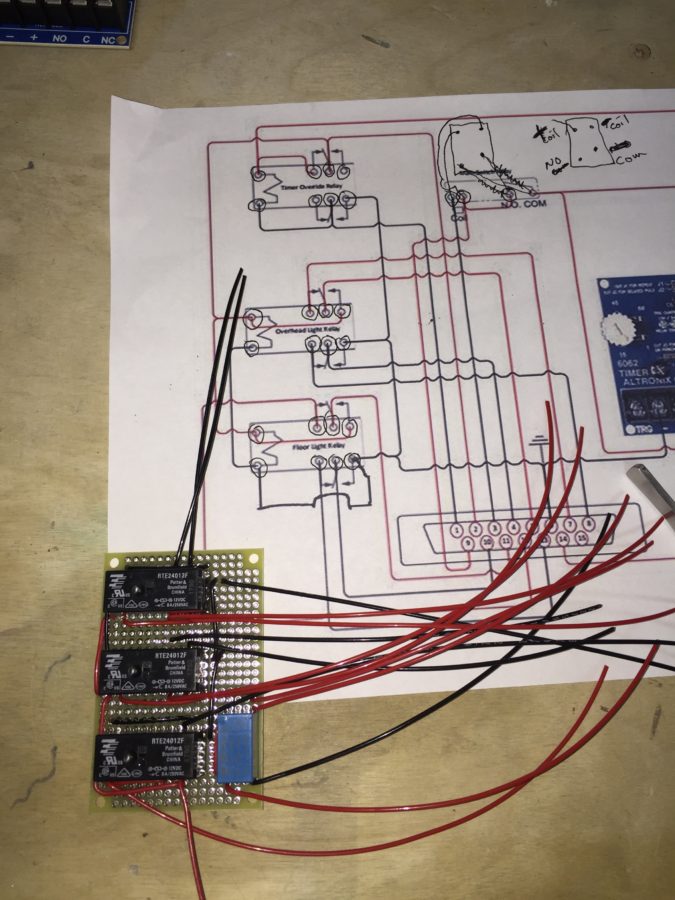
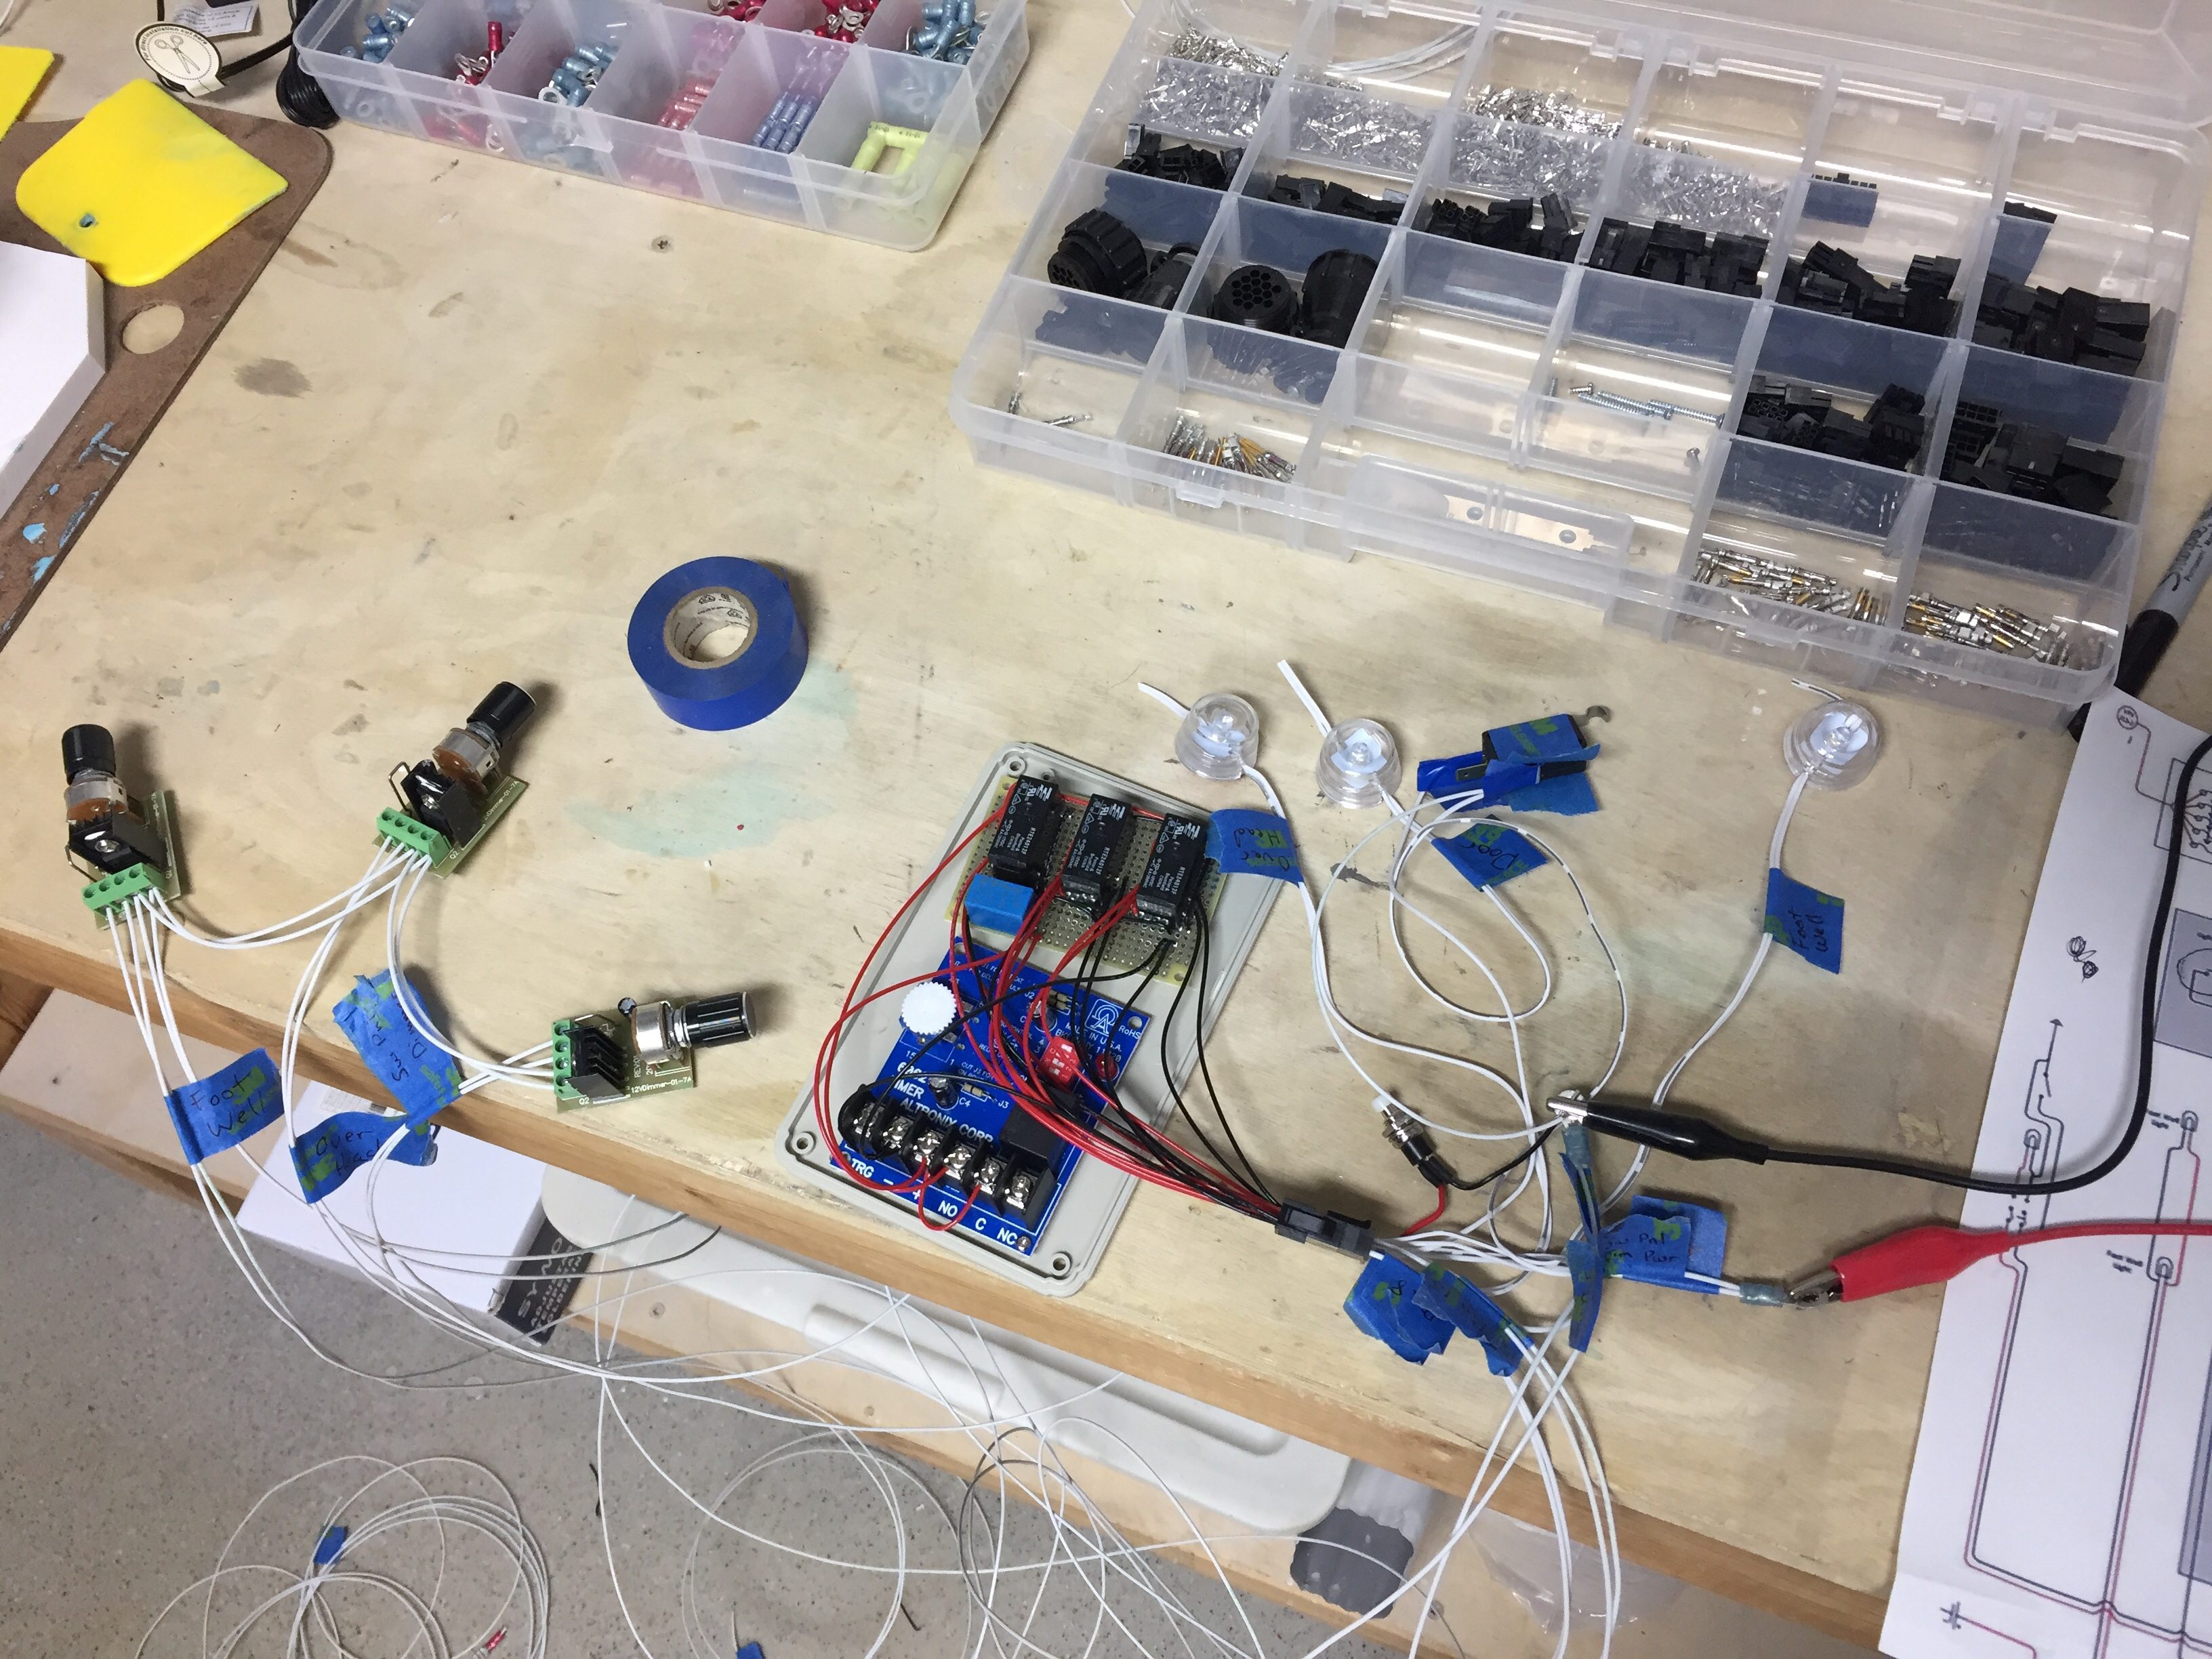
In between working on the overhead console, I decided to tackle a fun little project dreamed up by Ed Krantz (Good Plane Living) to control the interior lighting. He came up with a fancy little box full of relays and a timer to essentially make the lights behave as a modern car. While this doesn’t seem fancy, most little airplanes have one dome light from the 1960’s, so this is all pretty high tech. The best part is he designed it to work as a DIY project and kept it simple and functional. The best, best part though is he shared it online for others to benefit from, so thank you!

Without diving into the actual wiring schematic, the little box receives a signal from a micro switch that a door has opened. This in turn causes the three overhead LED lights to illuminate, the footwell lights, and under panel lights all to come on to full brightness, even if they were on using the dimmer. The timer is used to keep them on for a set amount of time then they all turn off. Once the door is shut, the whole system resets and the lights return to their prior state, either off or according to their dimmer.

I’ll have two additional LED lights, one on each door, that shine down on the wing when the doors are open. Ed had put each task light on the control as well, but I chose not to since I think the three overhead will provide plenty of light.

It also has a manual reset switch to allow a door to be open but reset the lights to off or dimmed in case you want to have a door open while taxing or any other reason. There will also be a master switch near the rear baggage door to control overall power. This is because even after the lights are reset, the timer does draw a small amount of power and in theory could drain a battery if left for many days, for example during extended maintenance.

After a few hours of laying out the components and soldering it all up, I hooked up a few cheap-o LED lights to test it all out. Just as Ed did, I forgot one ground wire but that was soon fixed and everything worked just as designed. It was a really fun project and will make night flying / loading a non-issue.

So on the overhead control panel, I will have all lighting switches (Nav, Strobes, Taxi, Land, Interior Reset) along with the dimmers for the panel, instruments, and interior lights.

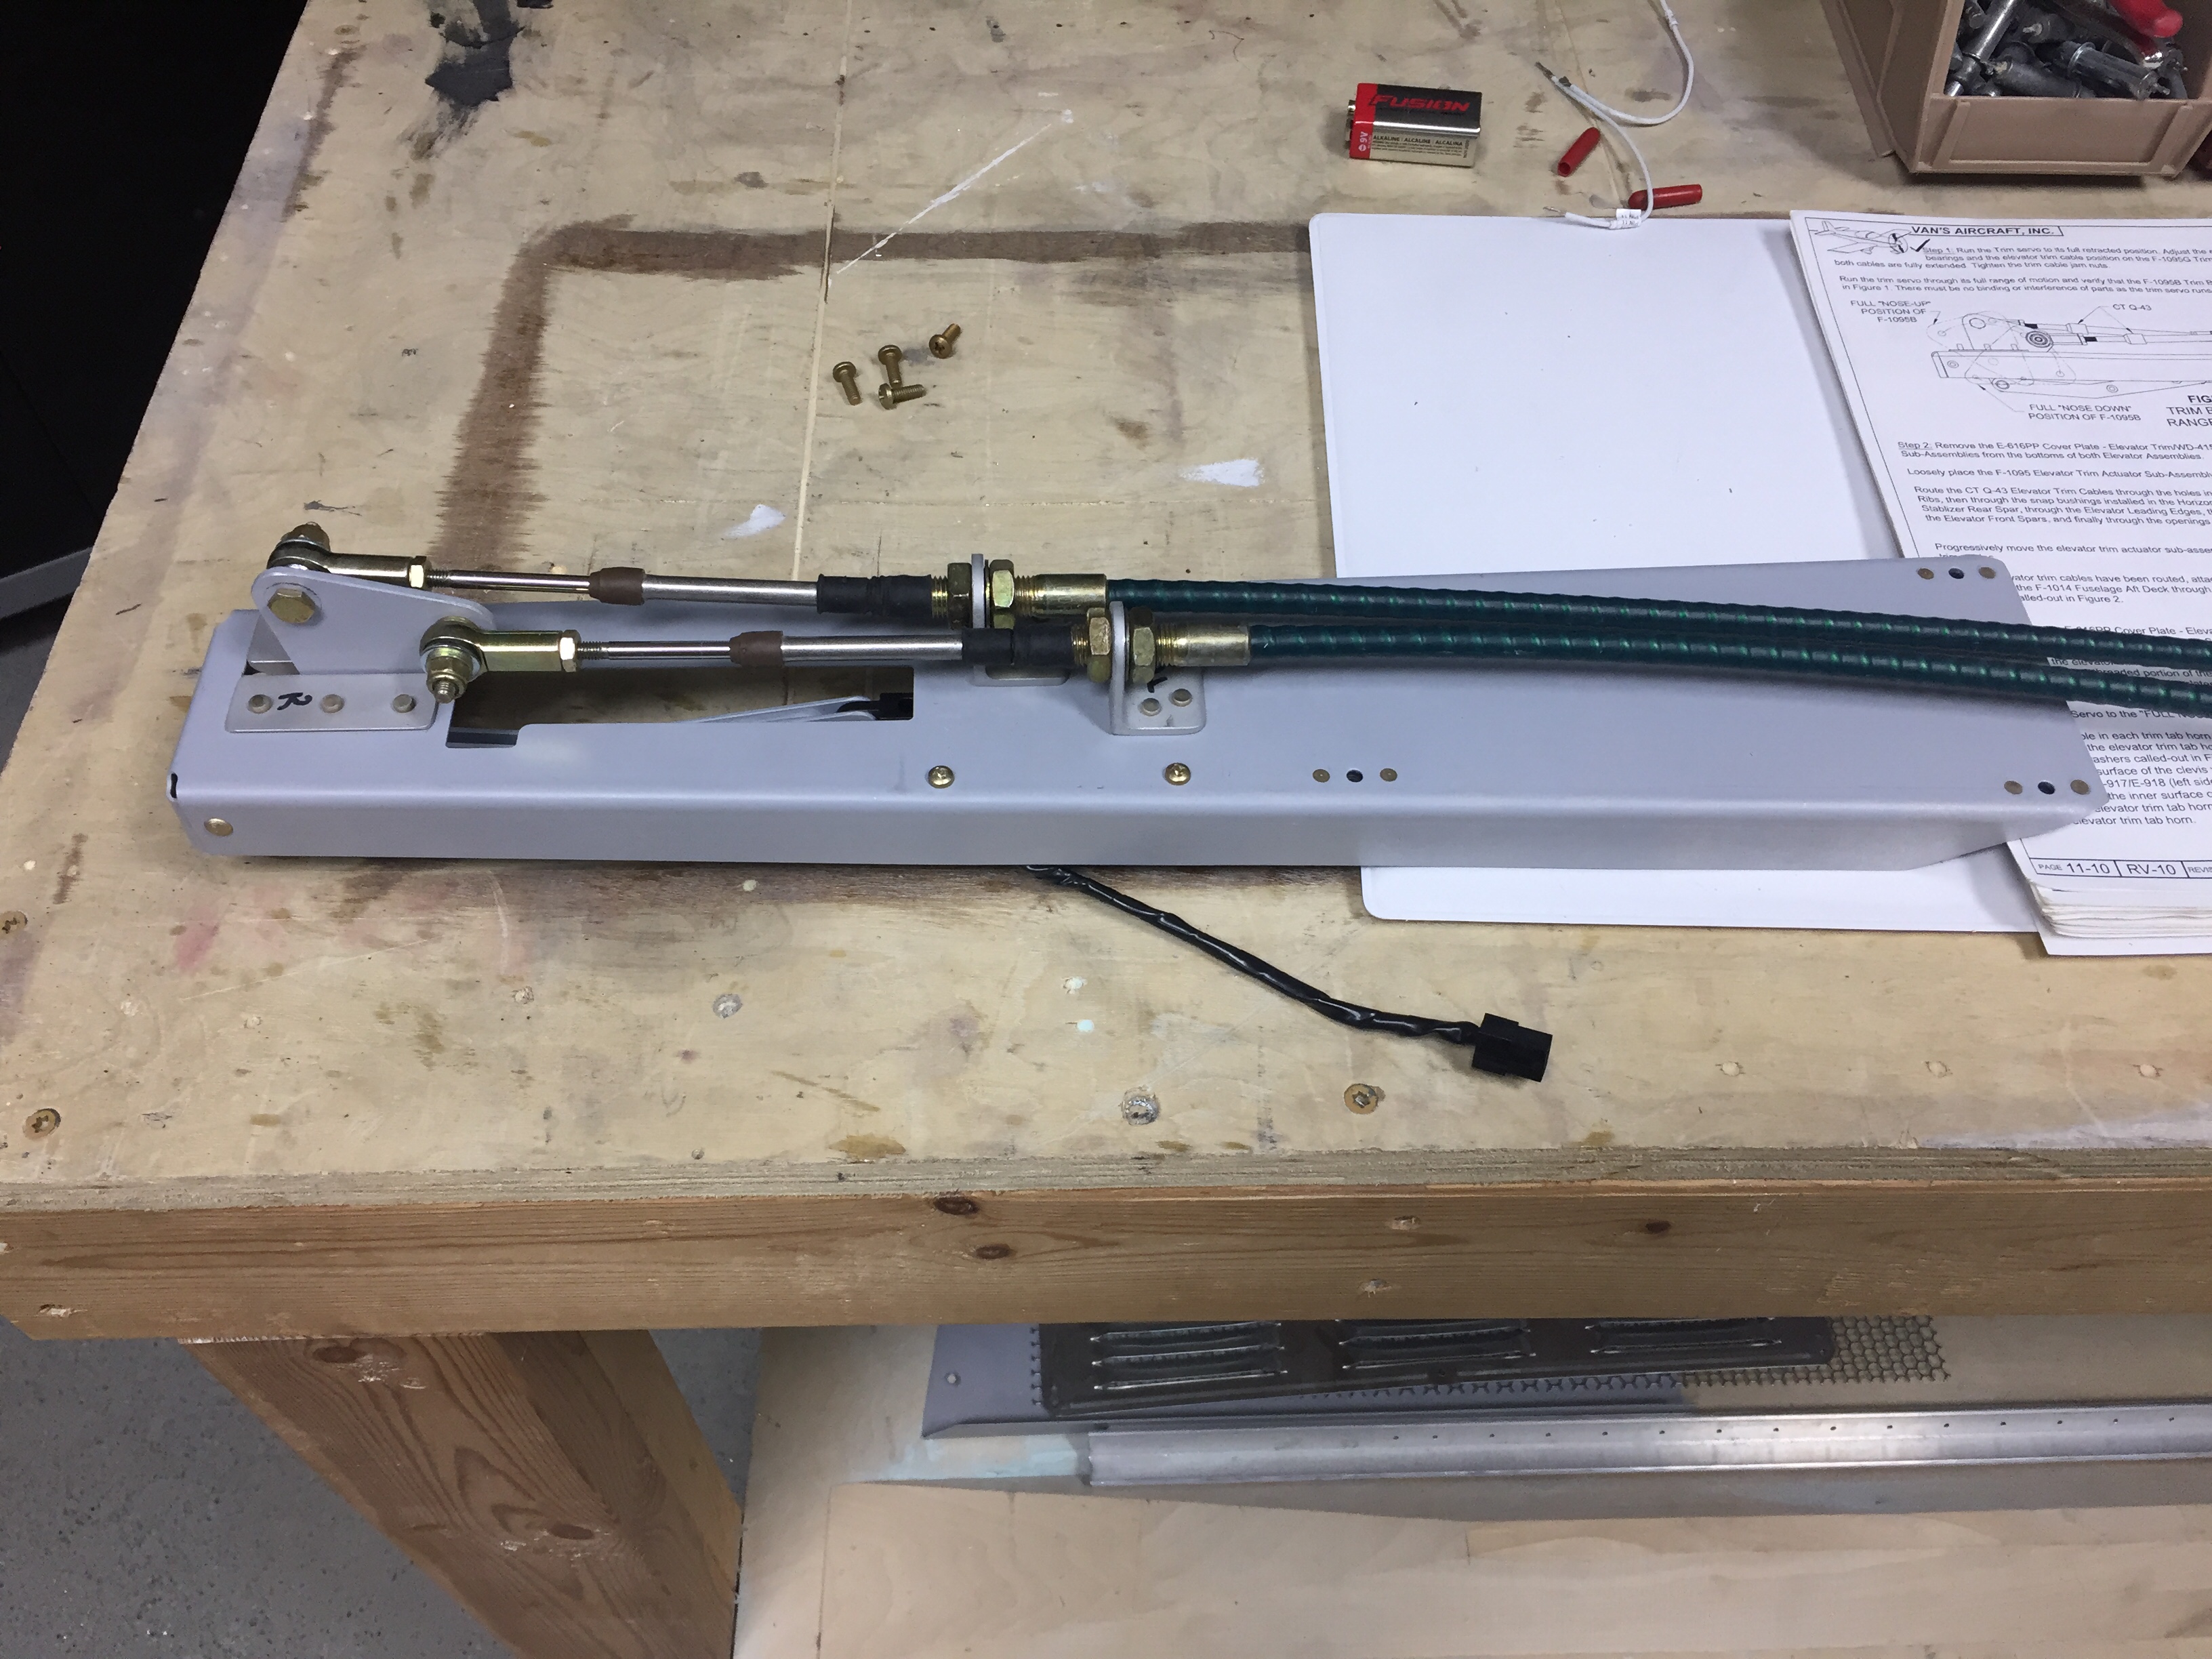
I also fabed up and installed the pitch trim servo mount. It was a pretty quick job and the wiring for the servo was already pulled during an earlier build session. I’m trying to get as much wiring roughed in now before much more structure goes in place.

In other news lately

In between the fuel tank tasks, I’ve been able to tackle a lot of smaller projects and tasks.  In no particular order, here’s what else I’ve been working on.

Aileron trim servo:  This was a pretty easy project, assembling the trim mounting which is actually built on an access panel that will mount to the bottom of the left wing.  Along with the actuator arm and some hidden hardware, the assembly attaches via springs to the aileron pushrod inside of the wing.  The actual servo is also hidden under the bracket.  I’ve ran trim servo wire from the wing root to the servo location and will have a disconnect to make mainenance simple.


Flap gap fairing:  These are long pieces that fill the void between the rear spar and top wing skin and provide better aerodynamics for the flap.  They were pretty easy to install and finally filled the reminaining line of rivet holes in the rear spar.  I was surprised at how much rigidity it also provides to the top wing skin where it overlaps the flaps.


Switches:  I wanted to get an idea of what my Apem switches were going to look like lit up and ensure that I could gget the lighting to behave like I want it to.  Each switch has two independent LEDs  and the switch itself is DPDT.  What others have done worked for me usiing one pole of the switch to control the bottom LED which provides a status indicator for the switch.   The top LED will be controlled with  an on/dimmer dial  and linked to a FDS LC-50 lighting controller which will control all interior and panel lighting.  There is a bit of bleed  on the lighting but I think it will have minimal impact  once installed.


Flying:  It’s really important to me to keep flying throughout my  build.  Rather than the typpical 172, I got a chance to take a ride in a Champ to go eat lunch and check out some other RV’s with a new friend.  It was a great day and I really enjoied my first tail dragger flight!!


Covering the Canoe

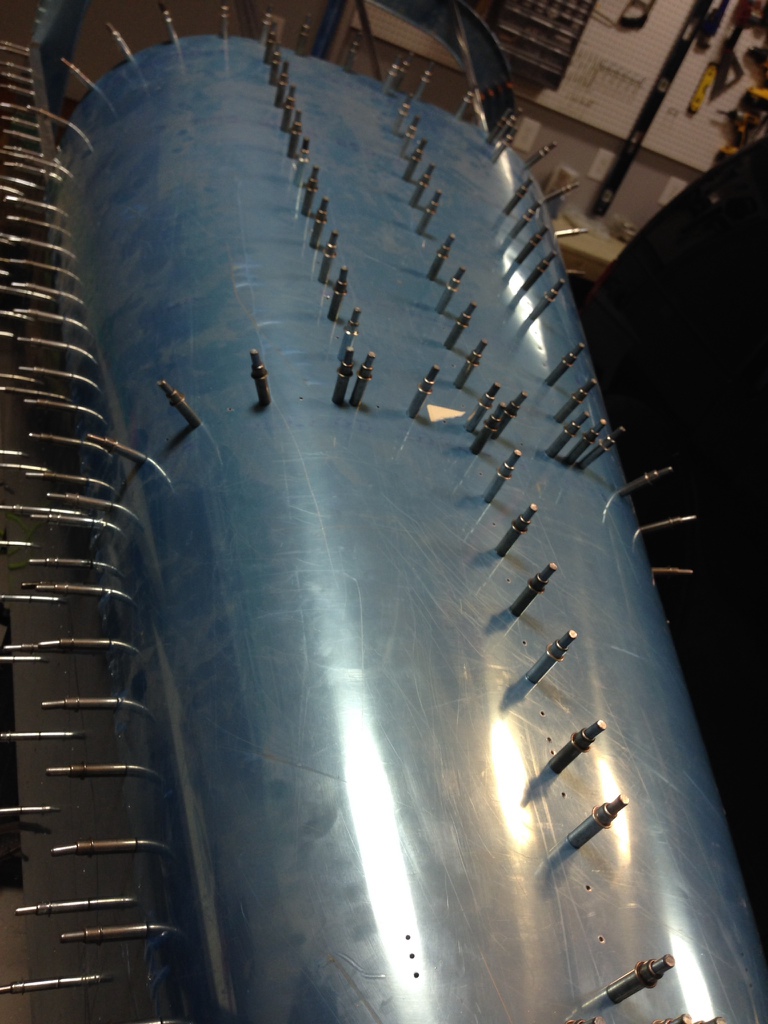
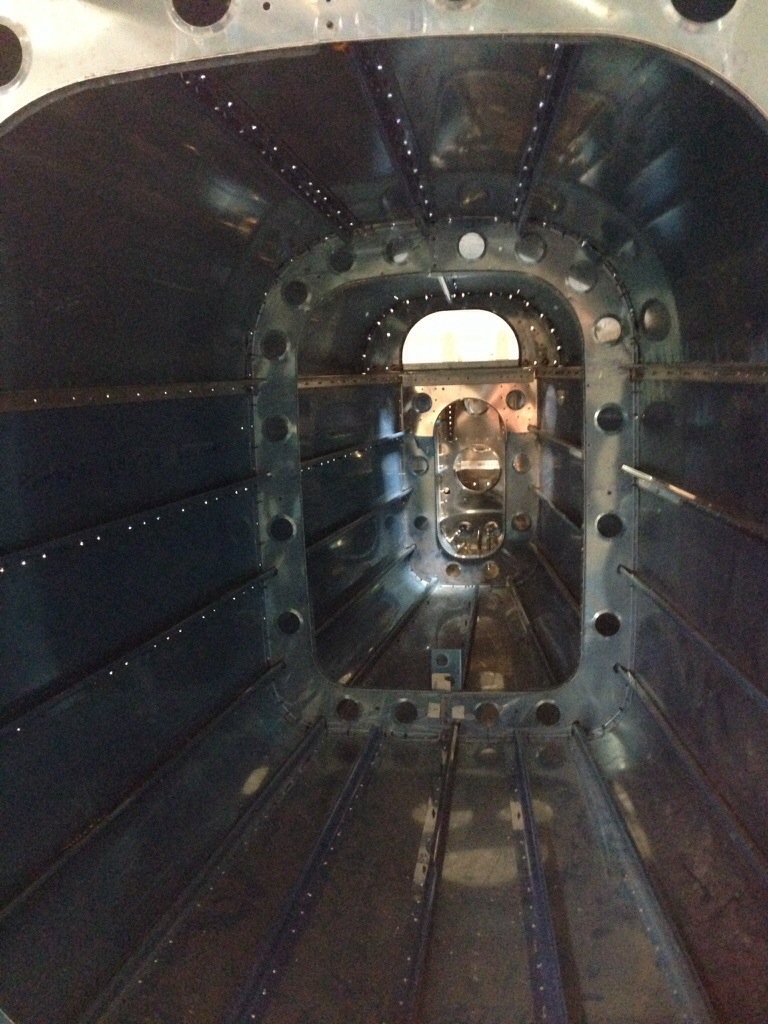
Over the past several days, I’ve continued work on the tail section.  I completed drilling the longerons on each side and am now working on the top skins.  The aft skin is completely drilled and ready for the forward skin next.  It was more of the same with using a lot of clecos to align everything well and positioning the stiffeners correctly to drill new holes.  The structure is much more rigid with the addition of the L-shaped longerons and top skin.  This whole process just includes a lot of match drilling and final drilling.  I’m already thinking about all of the deburring that needs to be done!

I again got to break out a tool that has never been used, the fluting pliers.  Several of the flanges on the ribs need to be “heavily fluted,” whatever heavily means.  I started by putting a good squeeze and it turned out to be right on.  Beginner’s luck.  Fluting the metal puts a kink in a flat piece so that the metal can bend around a curve and still have a 90 degree flap on it.

I also had a first (but probably not last) injury related to the project.  While drilling a longeron, I had my index finger on the back side a little too close and managed to put a #40 drill into the finger tip.  Fortunately my lightning fast reflexes (and the drill stop) prevented it from sinking in any further and I got away with just a band aid and sore finger.

Finally, I’ve been working on the preliminary electrical system design.  It’s very early but I am a systems guy and also want to plan ahead.  So I started with the switches that I wanted in the panel to ensure I have enough of the Aveo RockRack switches I want to use.  Of course, I missed one cover kit with all the lights and now can’t find them anywhere.  Very frustrating, as they are being discontinued and Aircraft Spruce no longer has the covers I need in stock.  I’m following a couple of leads now to see if I can get my hands on them and will grab a couple extra switches if I can put the whole plan together.  If not, it will be back to the drawing board.

20140102-224211.jpg

20140102-224215.jpg

Getting back to it

After a busy trip to HI for a NGAUS conference, I’m back in the shop working on the elevators. I finished disassembling both tonight in order to dimple one and remove all the blue film from both skins. The right elevator has already been dimpled but I found a few holes that he missed. I demurred on skin and sanded the edges down a bit to make them all nice and smooth.

I also laid out cut lines for my dimpler table that I have yet to build. It’s absolutely necessary for the skins so I can’t keep putting it off. The table saw is out and ready to go to work in the morning.

Finally tonight, I checked a few toys that came in the mail. The special bucking bar (one of which I already had and forgot about), another 400 silver clecos, and some future supplies. I found a great deal on VAF for the flush door handles, hardened door pins/guides, and a keyed alike flush lock set. At half price and brand new, it was too good to pass up. They will be stashed away for some time in the future. I also received the last of the Aveo Rockrack switches and caps. I heard a lot of folks having availability issues and didn’t want to lose out, so I got all the ones I plan on needing plus a few extra. I played around with the lights on a 9v battery and am really pleased with the way they look.

Hoping to get the table built tomorrow and get the elevators mostly irvine together this weekend.